Taking High Speed CWFS Data for Image Quality Measurements
Part of the Image Quality Improvement Project at the Hobby-Eberly Telescope will include the use of a high speed CWFS imaging to measure seeing in sub-apertures
updated for DIMM2 on upper hex at Az=315 - - 19 Jan 2021
updated for DIMM2 on upper hex at Az=80.001 - - 25 May 2021
updated for DIMM2 on upper hex at Az=280 - - 17 Jul 2021
-1. In June 2022 it became temporarily necessary to run this command to de-activate the firewall that is somehow preventing VimbaViewer on Zeus from connecting to the CWFS camera:
sudo systemctl stop firewalld
- During the last science/etc target before this test, get DIMM2 pointed at Vega (instructions)
- Select a CWFS target from the ENG21-2-122 program. These should be a 6-7th magnitude star (i.e., from the bsc catalog) and have IFU=000 (the IHMP).
- Make sure both DIMMs is running the whole time.
- Edit the "load_trajectory" command to add "az=280.0", and get on this trajectory with "go_next". Ask the TO to setup on the IHMP position from wiki (handshake from ACQ to a guider).
- Ask the TO to power on the CWFS and restart PAS (can do this while going_next), the RA may need to restart their TCS GUI or at least stop and start images again.
- Ask the TO to do the handshake to the guider, and to center and activate a WFS.
- Make sure all probes are storing images.
- Ask the TO to retract the ACQ mirror and deploy the CWFS mirror.
- Offset from IHMP to CWFS with this pre-Oct2020 command:
syscmd -T 'offset_trajectory(dx_ang=-5.1, dy_ang=-3.9, adjust_probes="true")'- For historical purposes, note that in Nov 2020 we found +4.2,-10.2; In Jan 2021 we got +7.0,-9.9 and +7.3,-9.9, during the period of instability for the PV/CWFS mirror.
- Try using a 1-5s exposure time for CWFS, and be sure that the "process" and "store" checkboxes are enabled on the "CWFS control" window in the TCS GUI.
- Look at CWFS x and y offsets (in the CWFS metrology window) and adjust the offset command (listed above) until offsets are less than 0.3".
- Once the CWFS is well-centered, run this command to allow VimbaViewer to take control of the CWFS:
syscmd -p 'CWFS_RelinquishControl()'
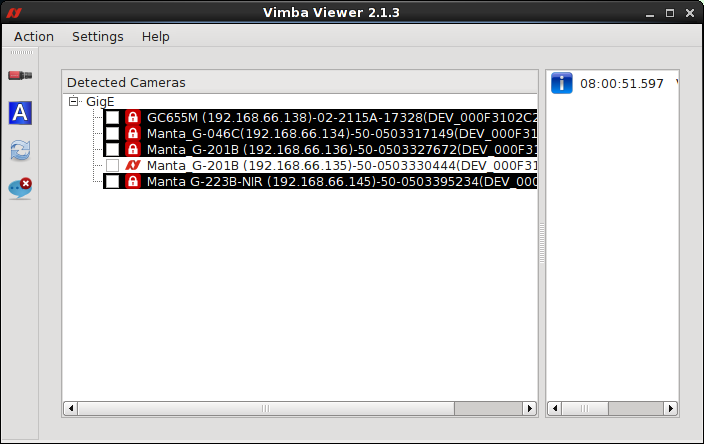
- On zeus Start the VimbaViewer by running: VimbaViewer.
- The first window that starts up is the camera select window. Click the check box next to the CWFS camera (it is the only one not black-ed out since you just relinquished it). Do not exit the Camera Select Window or the Camera Control Window (which pops up when you click the check box) will also exit.

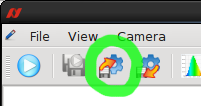
- Load CWFS camera settings file by clicking this button:

Choose the file called /home/mcs/astronomer/cwfs_4x4.xml . This will set the binning and ROI settings correctly.
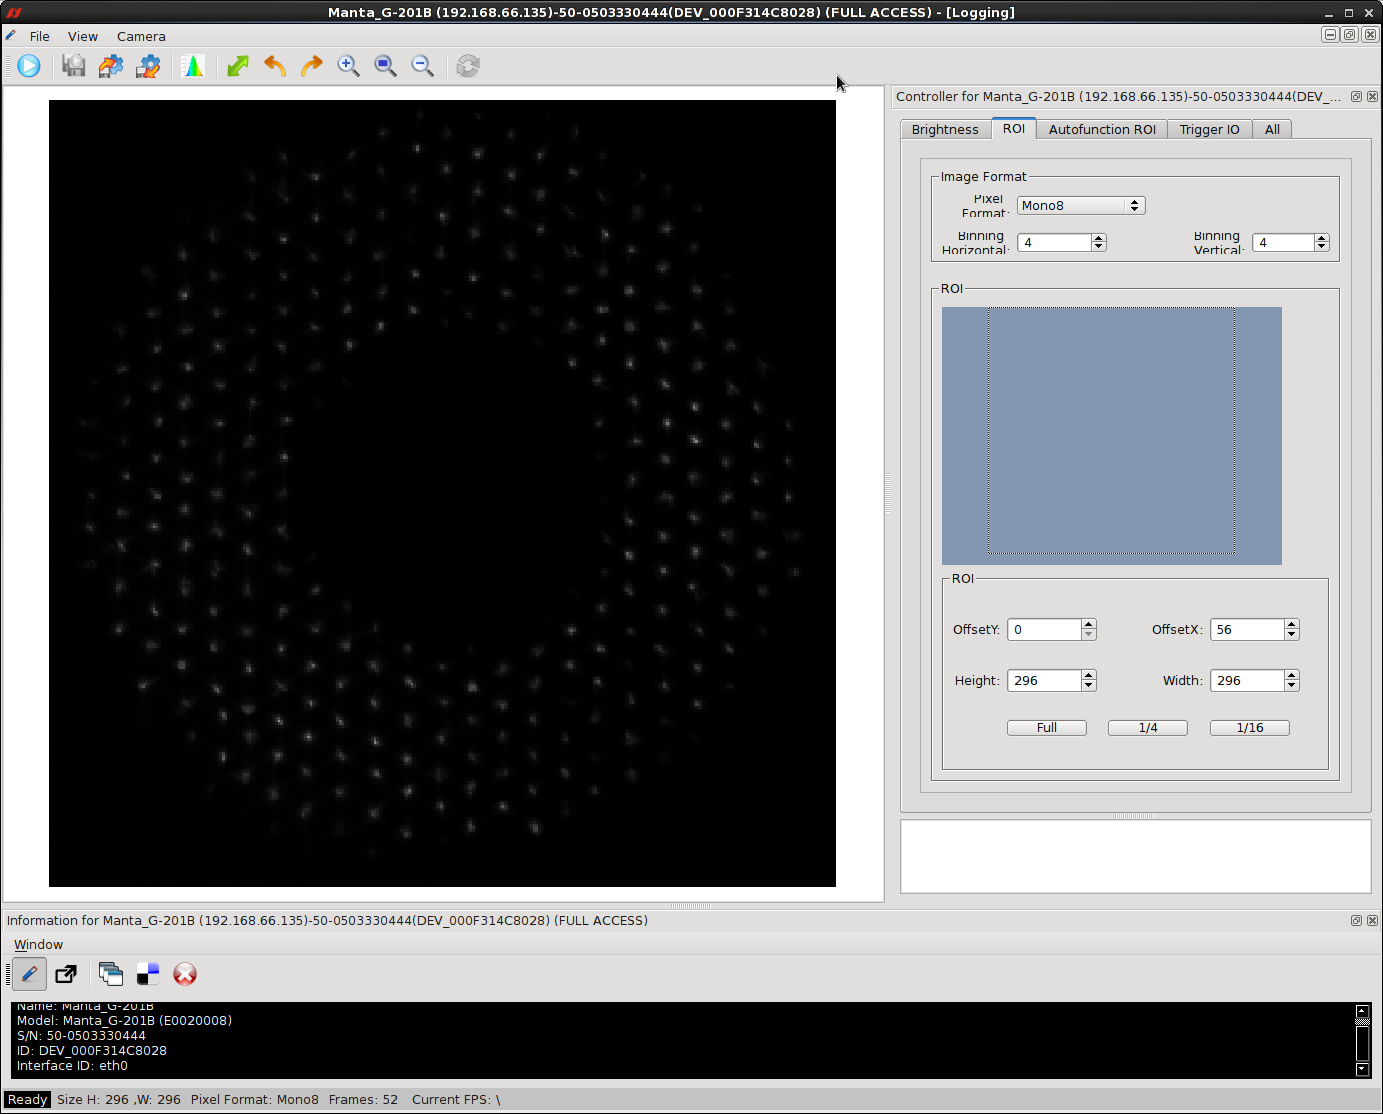
- In the "Brightness" tab, set the exposure time between 5,000 and 20,000 micro-seconds (or even shorter if necessary to avoid saturation). If you like, you can verify that the ROI tab shows that the binning is 4x4 and the ROI numbers are OffsetY:0, OffsetX:56, Height:296, Width:296, as shown in the screenshot below

- Click "play" icon to see images, then click "stop". To check for saturation, click File --> Save Image As and save the most recent image as tiff somewhere easy like {~/test.tiff}. You can open this with ds9 -photo test.tiff to see how it looks. Adjust exposure time if necessary.
- Set the parameters for a single series of 50,000 images by selecting File->Image Series Options... from the File menu. You may have to create the CWFS/ directory in the night's directory.
Format = .tiff
Name = YYYYMMDD_HHmm where YYYYMMDD_HHmm are year, month, day, hours, and minutes), ... for each image series that night
Destination Path = /hetdata/data/ImageQuality/YYYYmmdd/CWFS
Number of Images = 50000
- Start this image series at precisely 0s past the minute, and note the time it starts, to enter in NR later. Taking 50,000 images should take 28 minutes, and the speed should be around 40-50 FPS (fast enough).
- Note the state of the louvers and the frame rate (Frames Per Second, FPS) during this test (to be entered in the NR later)
- When this set is completed, you can cancel the trajectory and send the next target for the night. To return the CWFS to its normal state, click the "X"s in the top right corner of the Camera Control Window and the Camera Select Window. Then give control of the CWFS back to PAS/PFIP with:
syscmd -p 'CWFS_TakeControl()'
- Ask the TO to power off the CWFS camera and retract the CWFS mirror.
- Add night report entry. Use the "Target" option next to the "Add" button at the bottom of the NR and enter the target's index number from HTOPX. Click "Add" then on the box that pops up click "Update". Once it appears in the NR you can edit it to fill in the Start, Estart, and End times, and make sure it is an Engineering target with Instrument = CWFS.
- Add a comment to the observation in the NR (NOT the activity log) with the image series start time (hh:mm:ss), the Vimbaviewer exposure time (in microseconds), the FPS, and the louver status:.
estart=06:01:00, 10,000us exposure, 42.7 FPS, louvers 20% open
NOTE: do not say "20% louvers", instead say whether it is "louvers 20% open" or "louvers 80% closed"
- Increment this target in htopx (or with the "Accept" button in the NR), like we do for normal science/engineering targets in the queue.
OLD instructions continue below
- Set the parameters for an image series by selecting File->Image Series Options... from the File menu. You may have to create the CWFS/ directory in the night's directory.
Format = .tiff
Name = YYYYMMDD_HHmm where YYYYMMDD_HHmm are year, month, day, hours, and minutes), ... for each image series that night
Destination Path = /hetdata/data/ImageQuality/YYYYmmdd/CWFS
Number of Images = 3000
- Run this image series (taking 3000 images should take about 3.5 minutes), and the speed should be around 40-50 FPS (fast enough).
- Wait 1 minute and repeat step 15 and 16 (with new names) until you have taken a total of 5 (or 6) sets of images (each with their YYYMMDD_HHmm time stamp name).
- Create a text file log:
/hetdata/data/ImageQuality/YYYYmmdd/CWFS/YYYYmmdd_data.txt
and record the start/stop time of each set and other details using this template: (include any details about transparency/very poor seeing as needed)
#filename     startUT stopUT wind avg(mph) wind dir struct az louvres FPS
20191124_0813 08:13   08:19  16            208      232       closed  29.4
20191124_0819 08:19   08:22  14            204      232       closed  42.7
....
- When these sets are completed, you can cancel the trajectory and move on with your night. To return the CWFS to its normal state, click the "X"s in the top right corner of the Camera Control Window and the Camera Select Window. Then give control of the CWFS back to PAS/PFIP with:
syscmd -p 'CWFS_TakeControl()'
- Ask the TO to power off the CWFS camera and retract the CWFS mirror.
- Add night report entry. To do this run command cwfs_nradd (see help)
cwfs_nradd <start time> <end time> -incr_queue
Default exposure time is set on a base of 5 data sets like: 5 x 3min + 4 * 2min. 3 minutes to save 3000 images and 2 minutes between sets. To adjust exposure time use argument "-exp":
New Sept2020 version cwfs_nradd 02:33 03:20
Only if you were unable to add the entry to the NR, email Hanshin ( lee@… ) to let him know that you have done this test.
Attachments (3)
- vimba_cwfs.png (37.7 KB) - added by stevenj 4 years ago.
- vimba_load.png (10.3 KB) - added by stevenj 4 years ago.
- vimba_roi.png (135.2 KB) - added by stevenj 4 years ago.
Download all attachments as: .zip