DIMM Procedures
- Primary DIMM procedures, standard information and setup details
- DIMM specifications/details
- Closure conditions
- Start of night
- Aligning LX200 GPS (Primary DIMM)
- End of night
- Accessing finder cam video
- Tips and advice
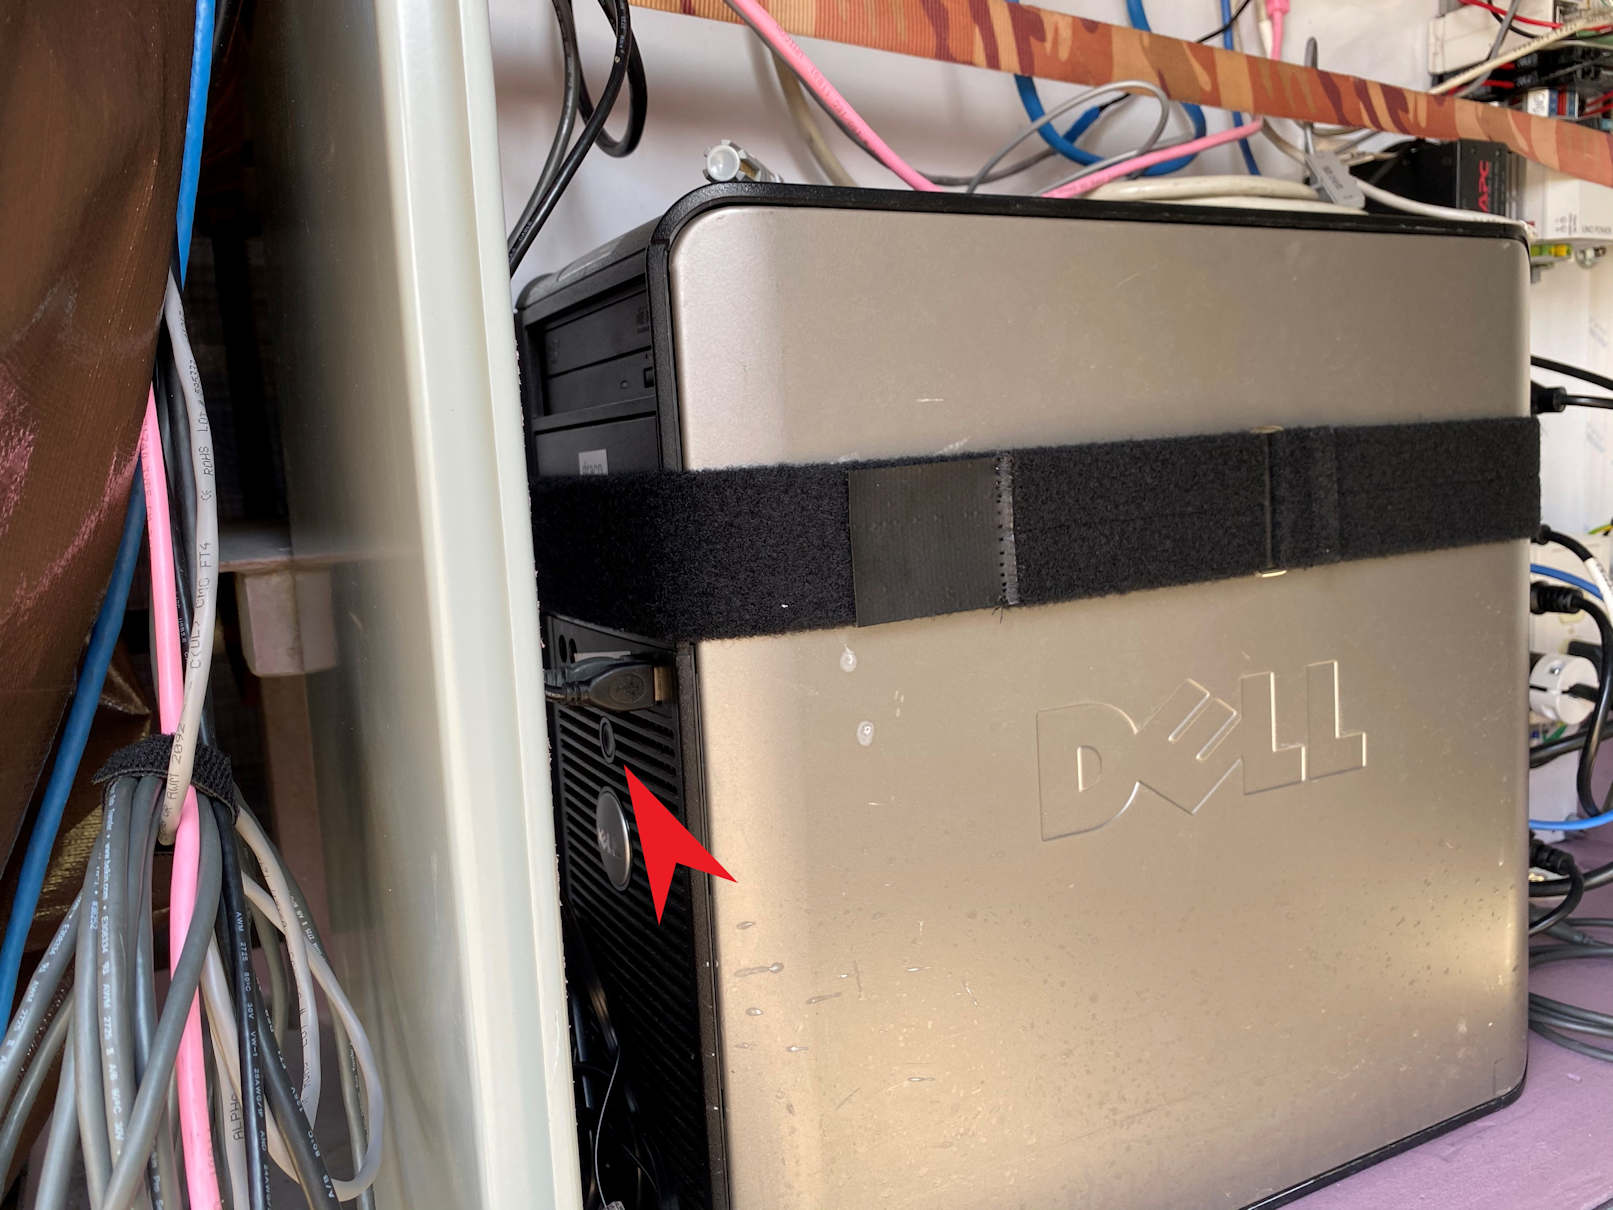
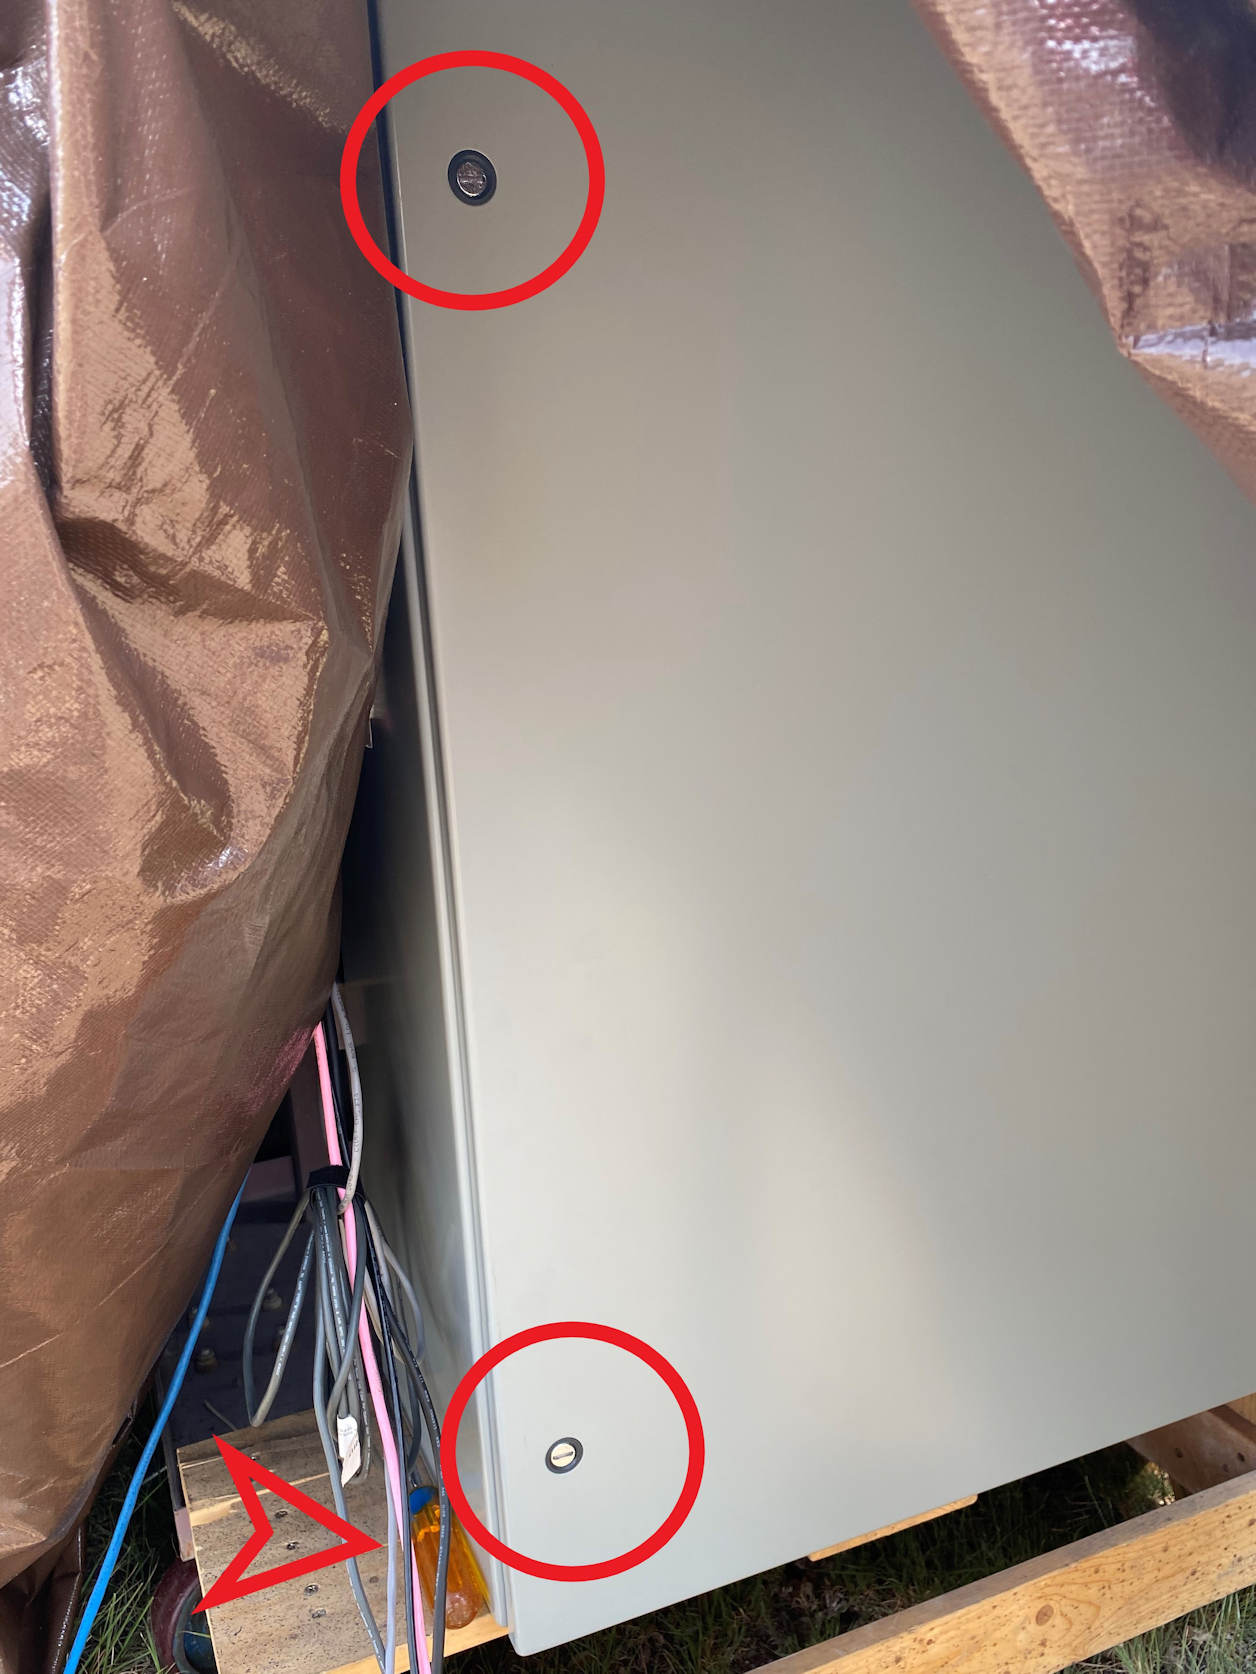
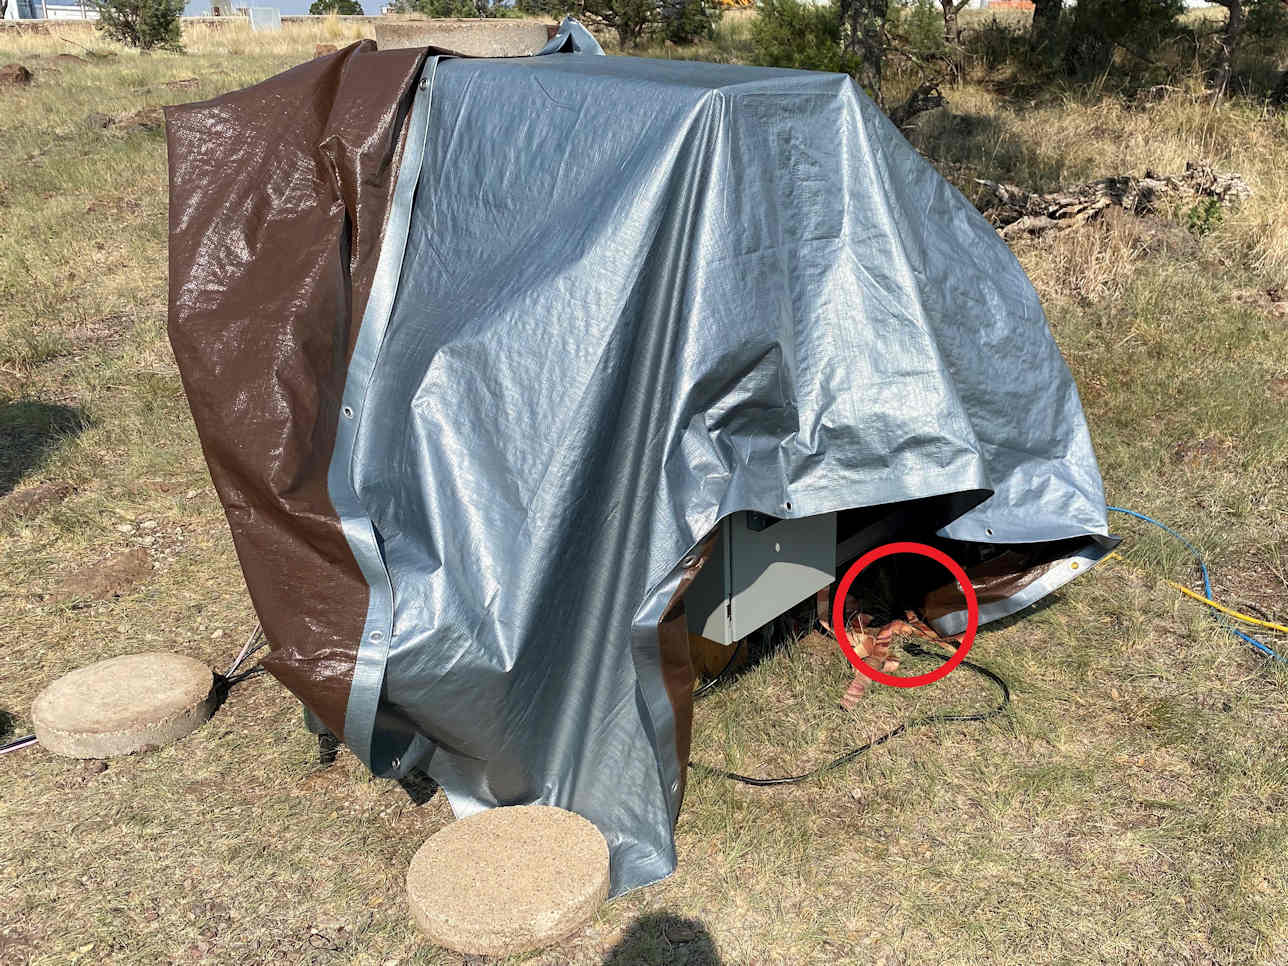
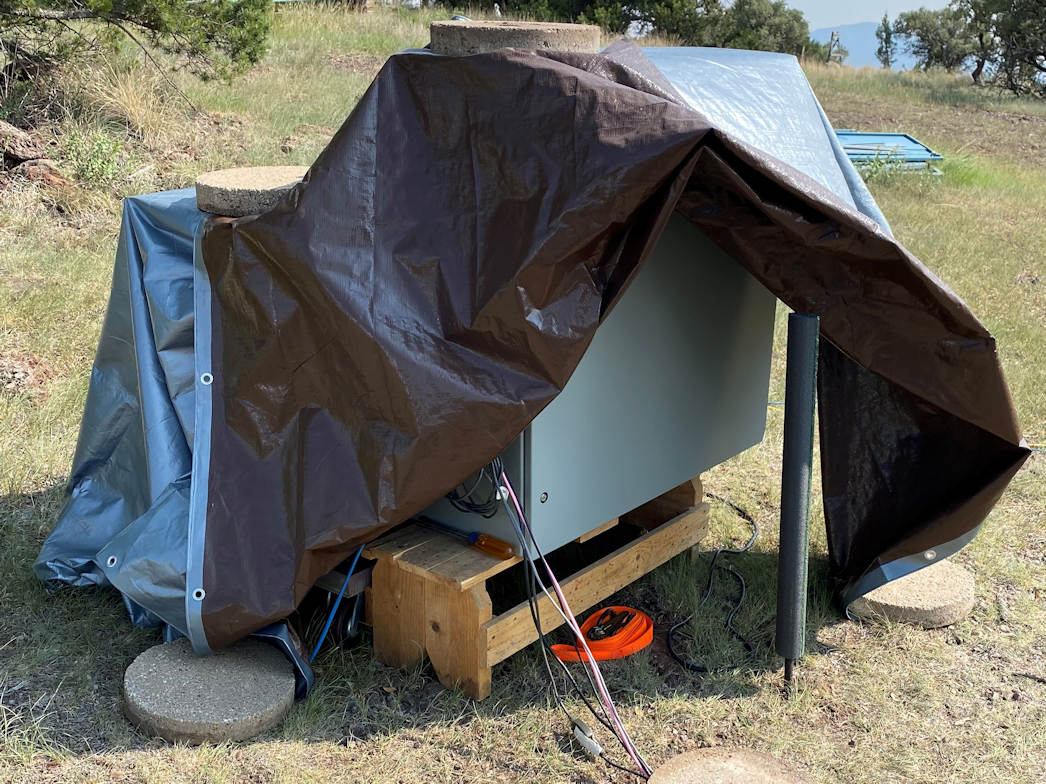
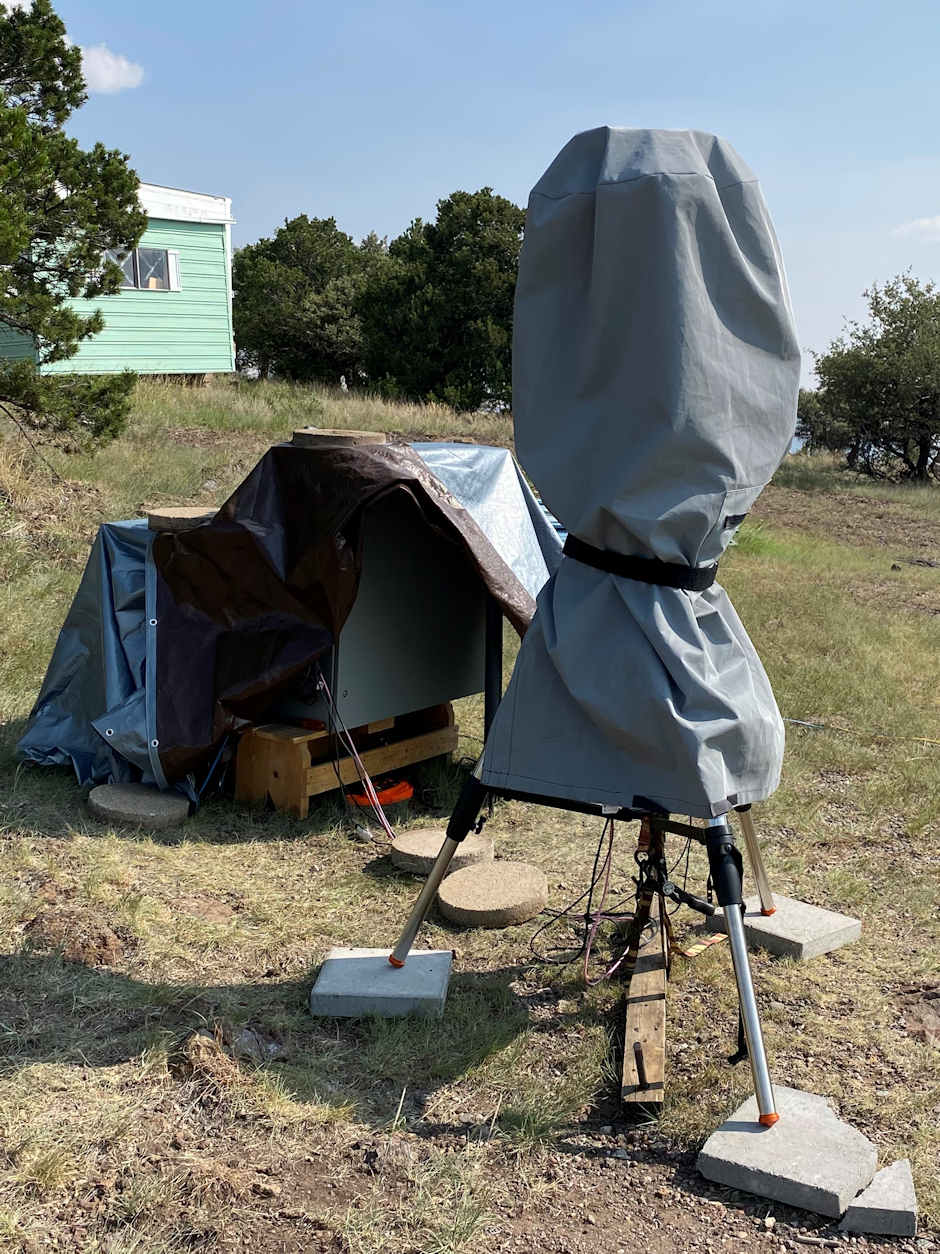
- Moving DIMM from the control room
- Setting up lX200 Classic
- webcam: http://10.10.10.18
- or when name resolution is working: http://dimm-cam.as.utexas.edu/
Primary DIMM specifications/details
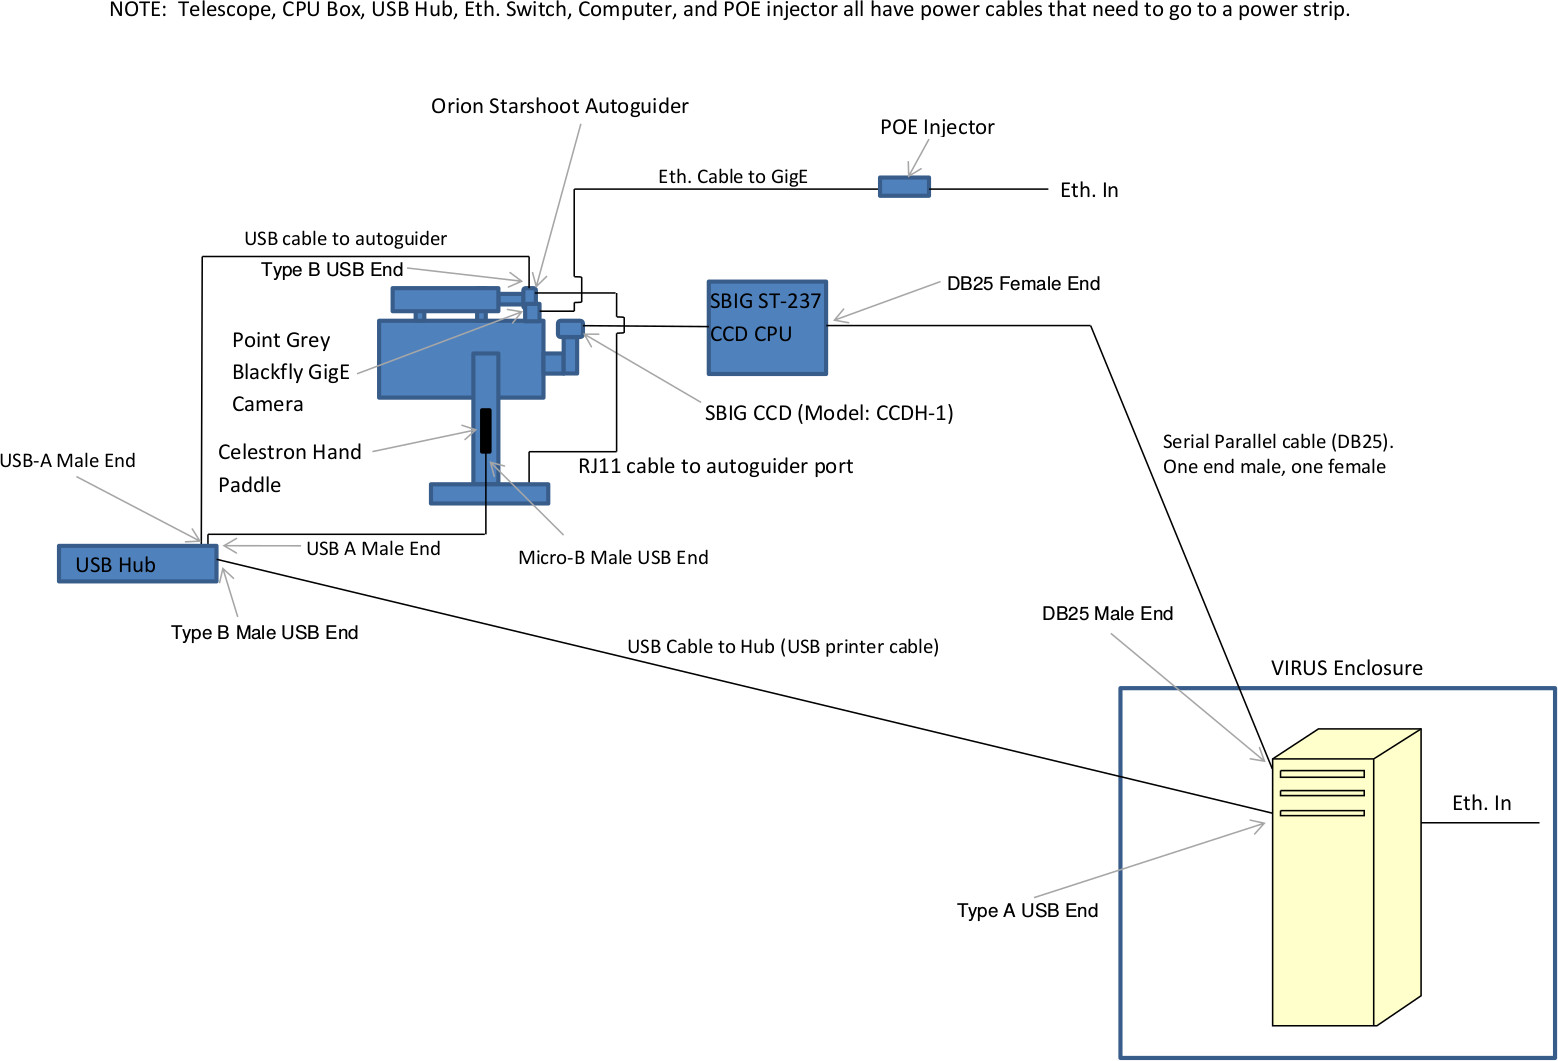
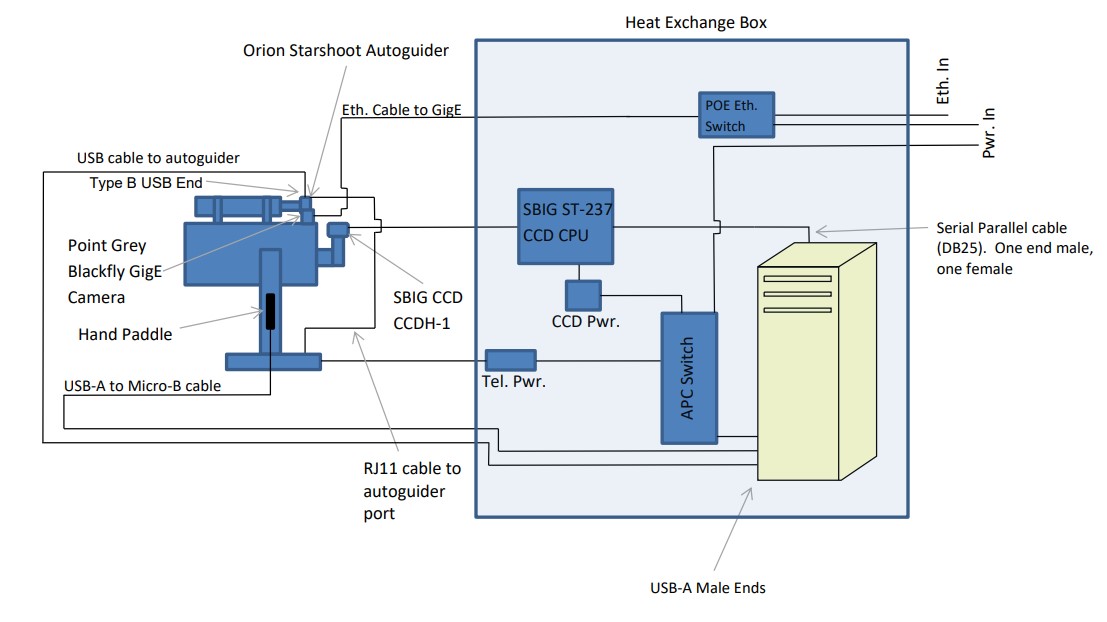
The Primary DIMM is a LX200GPS 12" Meade SCT f/10 with a 3048mm focal length. The CCD used for DIMM measurements is a ST-237 SBIG imaging camera system, a Meade f/6.3 focal reducer and field flattener (Part No. 07545), and no filters in use. Also attached to the primary DIMM is a low-light video camera which feeds the screens in the control room. Currently (June 2020) we are still using the custom DIMM software to run the CCD and AutoStarController to operate it remotely when necessary.
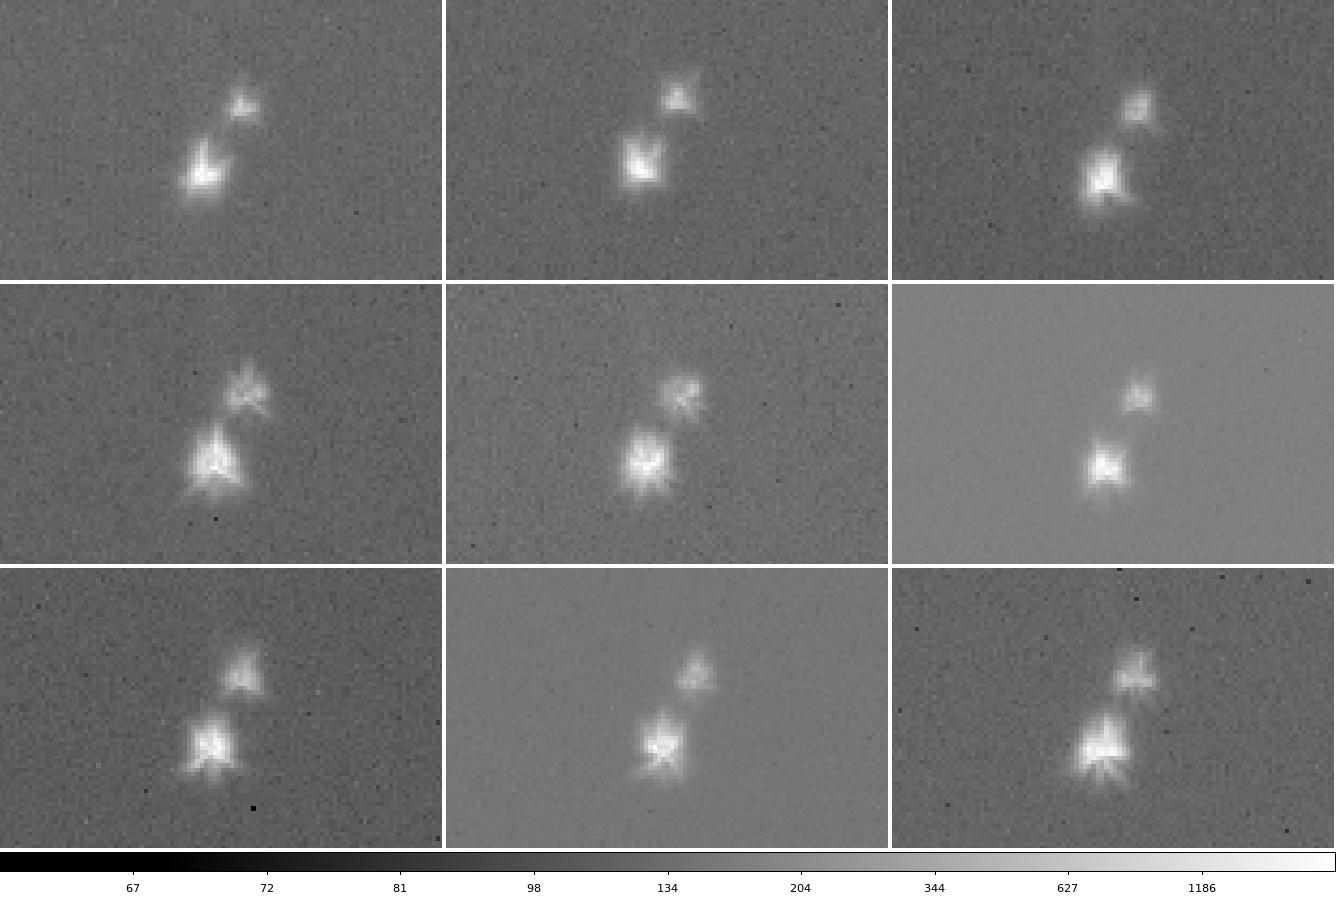
The plate scale on DIMM has been measured using data Justen took on Mizar on 20200620 UT (after removing the aperture mask). These images are also available at ~astronomer/dimm/dimm1_mizar_20200620/. In a series of exposures, the x/y pixel values of both stars were measured (using IRAF IMEXAM's "a" photometry task for centroiding) as:
264.16,239.83    273.09,255.22
265.41,237.49    274.02,253.24
296.53,237.27    304.80,253.81
295.46,231.16    302.07,246.56
296.58,255.03    305.65,241.26
292.30,218.06    300.57,234.49
290.95,216.36    297.95,232.04
292.81,208.27    300.31,224.09
The average separation on the sky should be 14.4". Unfortunately these data had a soft focus (note appearance of partial donuts in images below). Still by measuring 8 images we determined an average plate scale of 0.82+/-0.03 arcsec/pixel. This is close enough to the 0.814 we are currently using in the primary DIMM software.

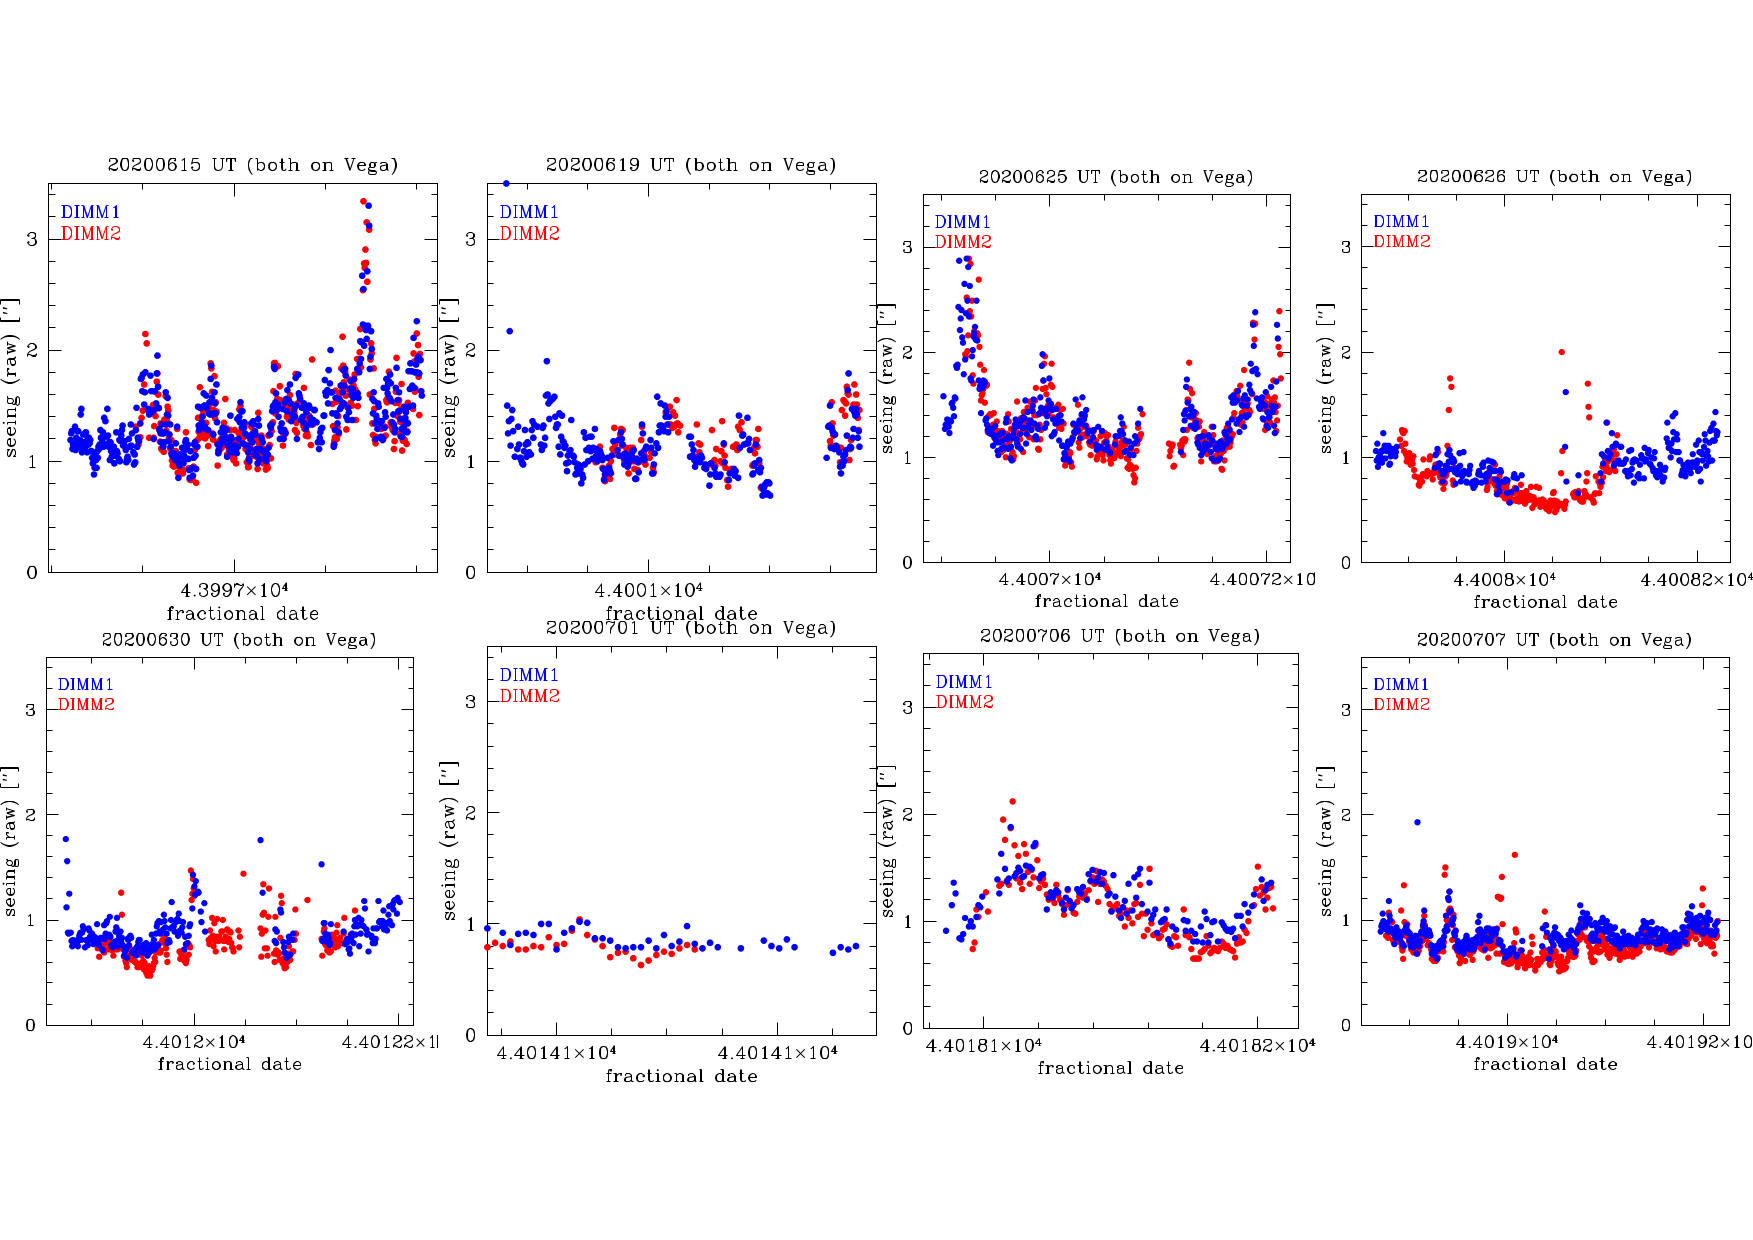
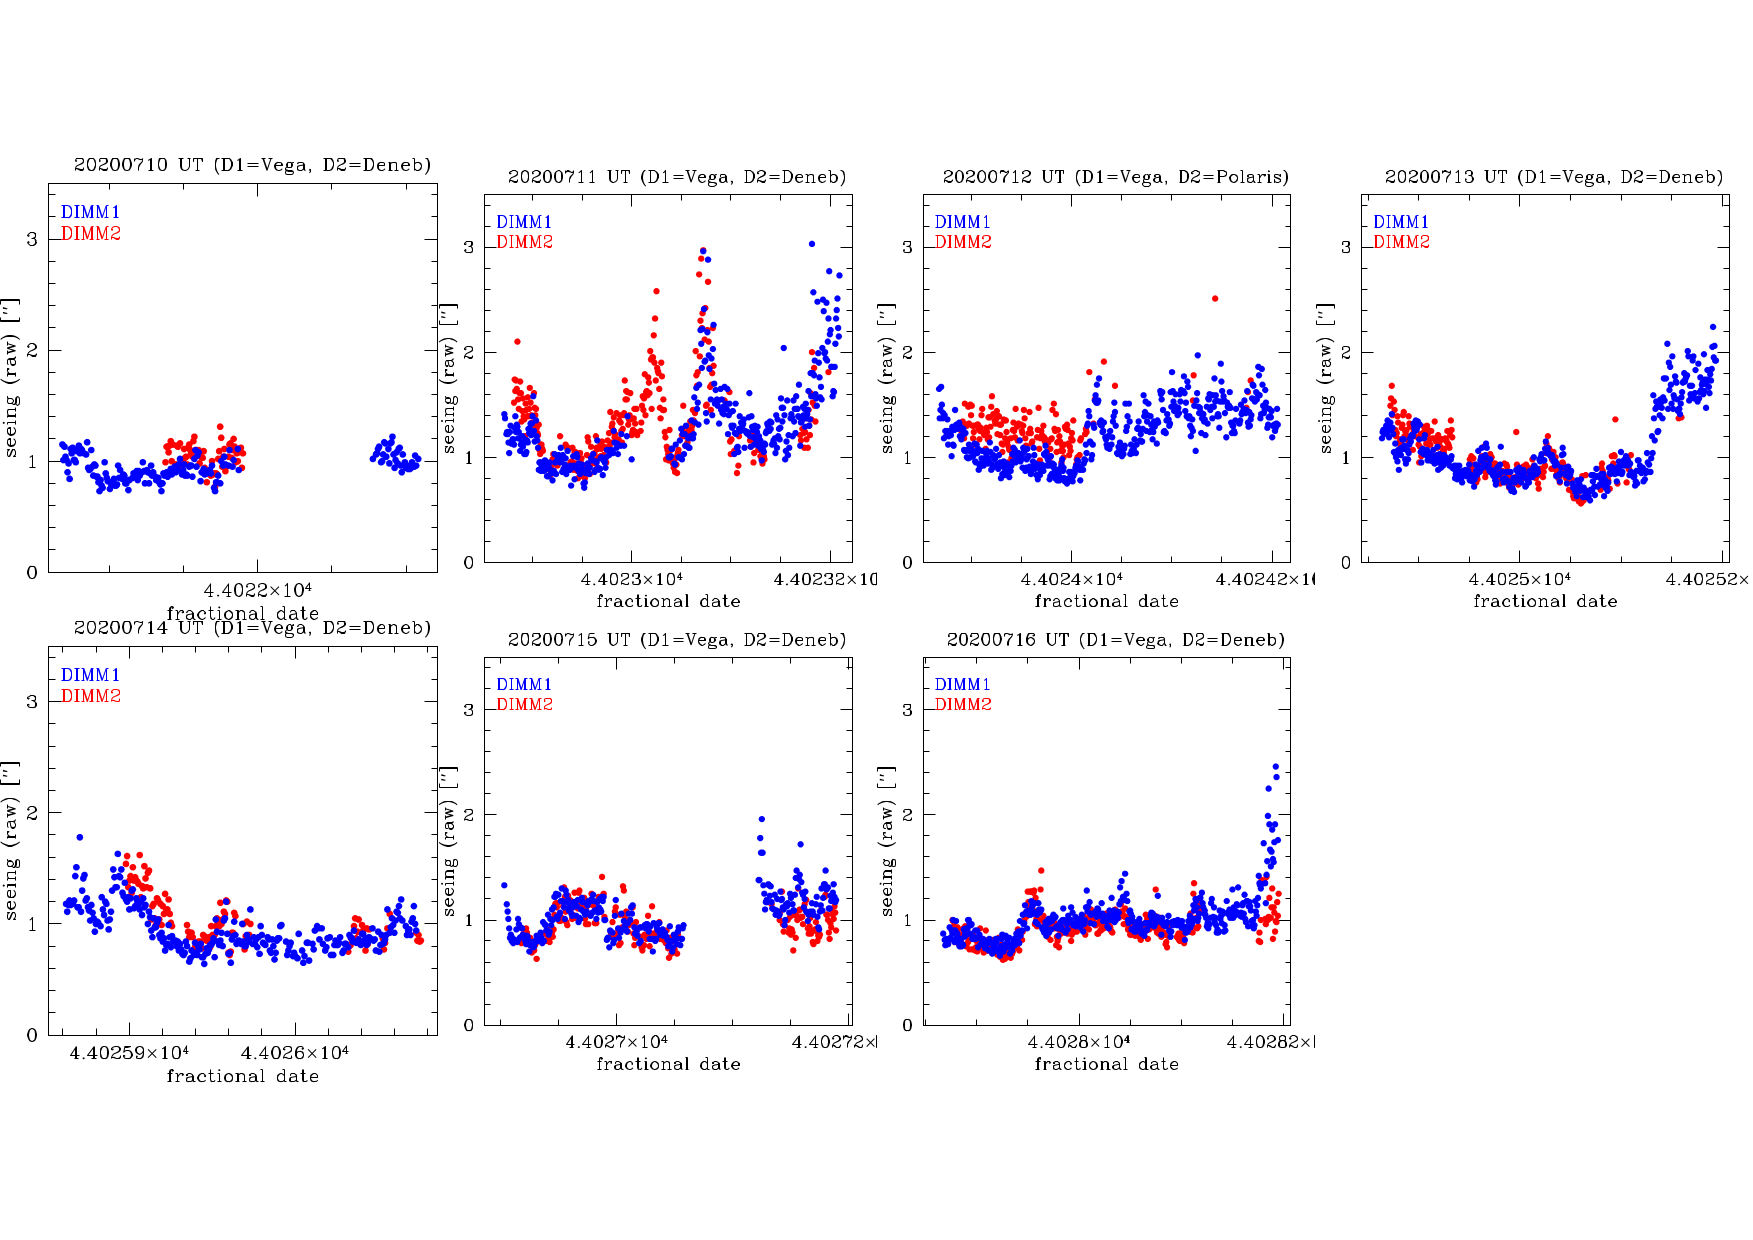
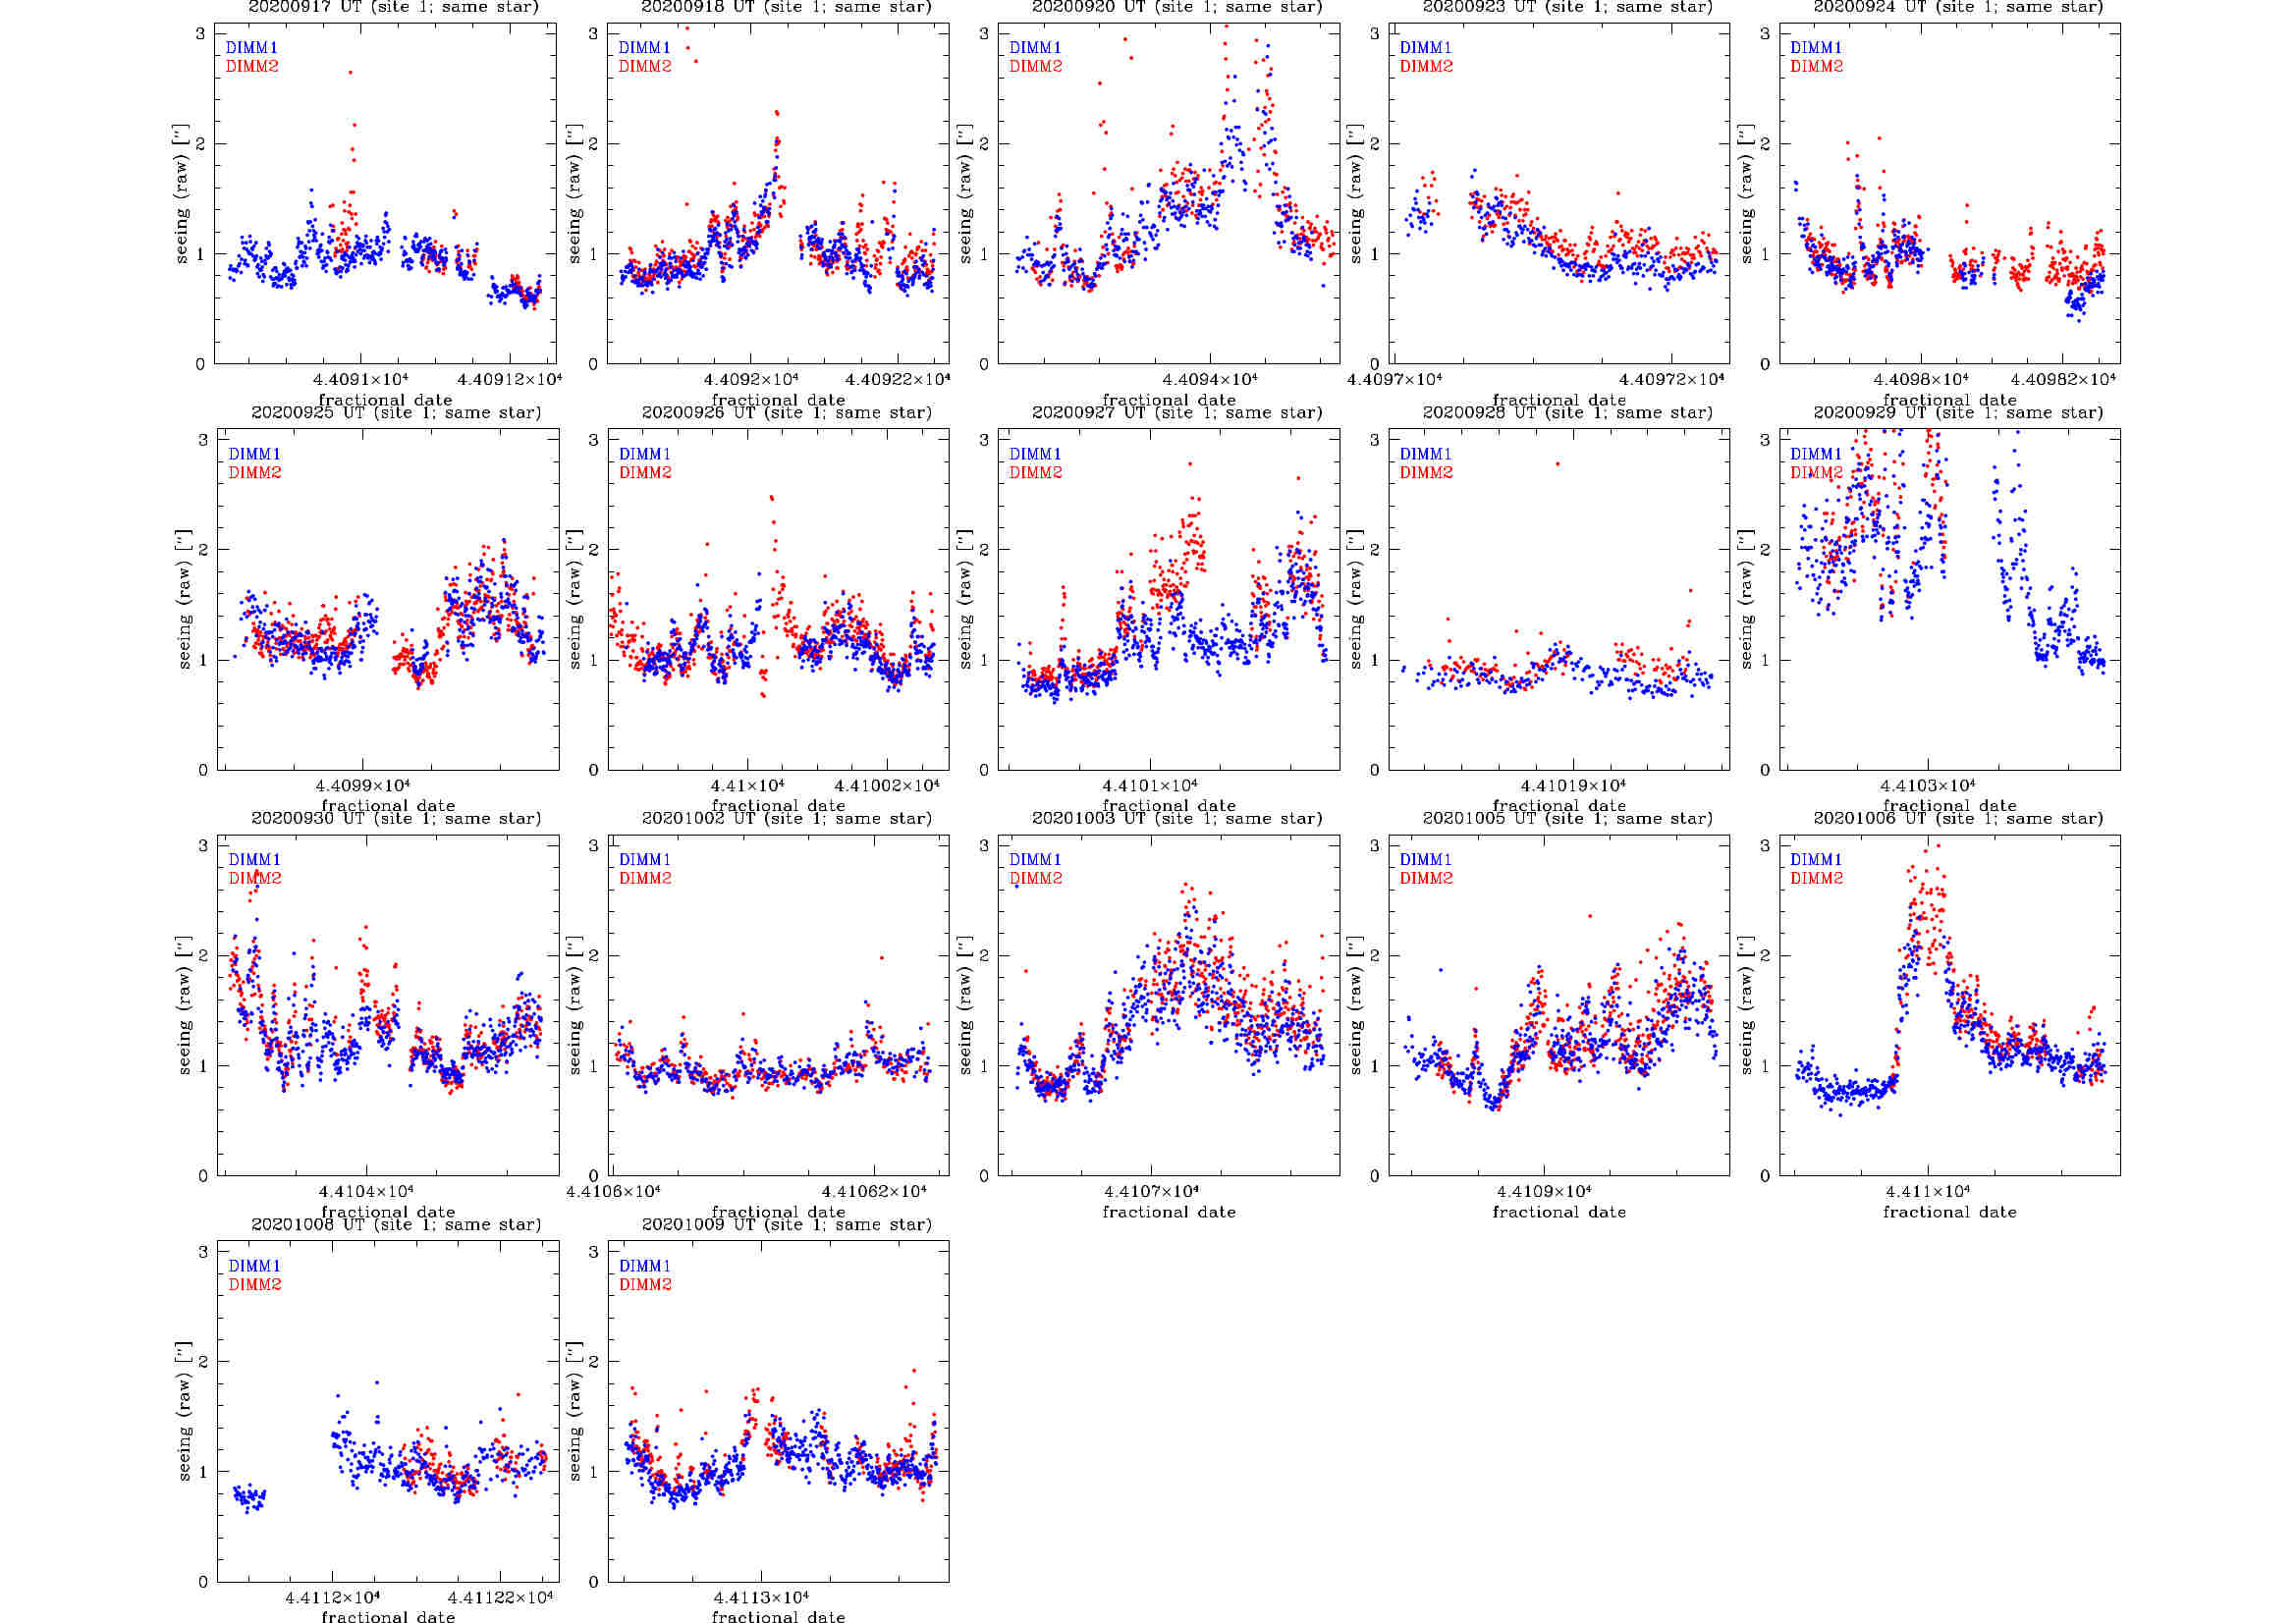
DIMM data is being stored nightly (copied at 13:00 UT) in /hetdata/data/ImageQuality/YYYYMMDD/DIMM/ in folders called DIMM (primary DIMM on tower) and DIMM2 (secondary DIMM, currently mounted on exterior of tower).
Note that the dimm2 computer (primary dimm) is available at: 192.168.66.20
DIMM closure conditions
As discussed at the staff meeting on 2 July 2020, DIMM closure conditions are the same as the HET's closure conditions. If the humidity/dust/etc sensors require HET to close, then the RA should immediately close the DIMM as well. If the TO identifies threatening clouds or radar signatures that warrant HET to close, the DIMM should be closed immediately. In this way, the TO makes the call for closures of all telescopes, and is responsible for communicating that information to the RA. The RA is then responsible for immediately closing the DIMM when necessary.
Note that if the HET is idle because of heavy non-threatening clouds and the TO decides to close the dome, the DIMM may remain open. The TO should still monitor sky/weather conditions and notify the RA if a DIMM closure is warranted.
After the TO notifies the RA that the closure conditions have been resolved and it is safe to open again, the RA may wait until conditions are definitively stable before re-opening the DIMM. This may also be delayed by ongoing science observations (i.e., wait until a >15min exposure or a re-stack when you have enough time to re-open the DIMM). It is not worth closing and re-opening the DIMM more than a few times per night. The primary goal is to protect the DIMM against poor weather (dust/humidity/rain/etc), even if that means missing some seeing data in marginal conditions.
Setting Up LX200 GPS (Primary DIMM)
Start of the Night
Before going outside, check that the RA radio and the control room radio are both on "H1" and can communicate with each other.
If the telescope has been shutdown properly setup can be very fast:
- Unlock and open the door (using patented knee-assist method)
- Press and release roof shutter open button (on high panel immediately inside and left of the door)
- Press and hold louvre open button until a breeze is felt (next to the shutter buttons)
- Turn on power to the Telescope on the base panel of scope
- Turn on power to the CCD which is on the far side of the enclosure as a small black box
- Open the keyboard tray and turn on the computer monitor using the small fob next to the keyboard (might need to move mouse to wake it up)
- Select DIMM login and enter DIMM password (on post-it note left of keyboard)
- Click the time and date on the computer in the lower right corner
- Using the telescope hand-paddle hit Enter to choose "no" Daylight savings time
- Using the hand paddle enter the computer time and then hit enter (be sure that you select AM or PM appropriately)
- Using the hand paddle enter the computer date
- Start the DIMM software on the computer by clicking on the DIMM icon on the Desktop. This will start the CCD cooling
- Using the hand paddle, press "mode" to get to the "Object" menu and then press Enter
- use the arrows at the bottom of the hand paddle to select "Star" and then press Enter
- use the arrows at the bottom of the hand paddle to select "Named" and press Enter
- use the arrows at the bottom of the hand paddle to find the star of interest (e.g., Deneb) and press Enter
- Note always select stars that will stay north of the Zenith.
- on the hand paddle press the "Goto" button
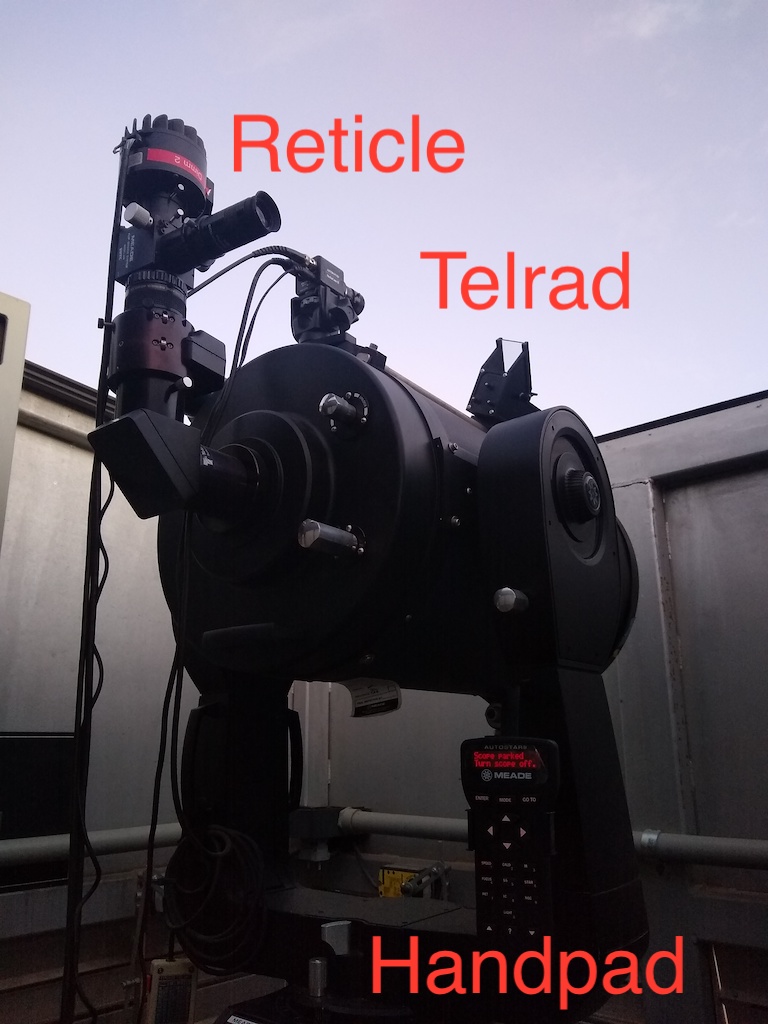
- Turn on the reticle on the Telrad finder (see figure below)
- select the number "1" on the hand paddle to set the speed and then hit another number to select the speed rate, e.g. 1=guide, 9=slew
- starting with speed of 3 or 4 is usually good, but faster or slower than that may be helpful
- center star in the Telrad finder using hand paddle controls
- once centered, turn off the Telrad reticle
- flip the flip mirror into the eyepiece box by rotating the shiny metal thumb-screws a quarter turn (marked as reticle in the figure below) so that you can see the star images in the eyepiece (there should be two).
- shine your flashlight into the hole on the side of the eyepiece to illuminate the reticle (rectangular boxes)
- use the hand paddle (perhaps a slower speed) to center the star images into the center of the boxes
- flip the flip mirror so that the stars disappear from the eyepiece and land on the CCD
- on the telescope hand paddle, set the speed to "guide" (#1)
- sync the telescope with the current requested star by holding down the enter button for 5 seconds, then release. It should beep at you and say it sync'd when you press enter again.
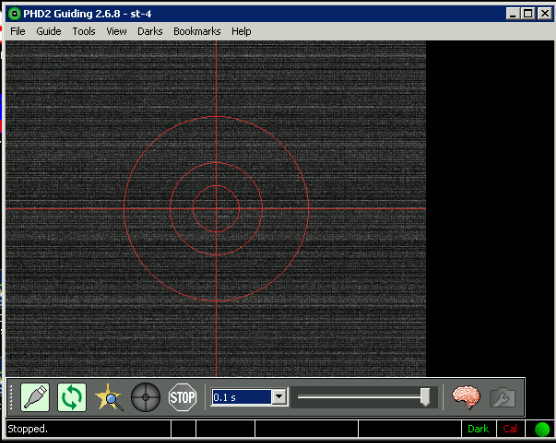
- on the DIMM software, click the "Start Seeing Measurements" button
- Note: do not change the binning or exposure times or any other parameters as these may impact the seeing values that are determined.
- also select the radio button for speed to "Guide", and check the "auto-center" check box
- once good seeing measurements are coming in, turn off the computer monitor using the small fob next to the keyboard, close the keyboard tray, and close the door behind you

Aligning the DIMM Telescope
If the telescope needs to be aligned this is the procedure. This is needed when either the alignment has been lost or the telescope has been turned off without parking it.
NOTE: DO NOT ATTEMPT TO FORCEFULLY MOVE TELESCOPE WITHOUT LOOSENING THE LOCKS, THIS WILL DAMAGE IT!!
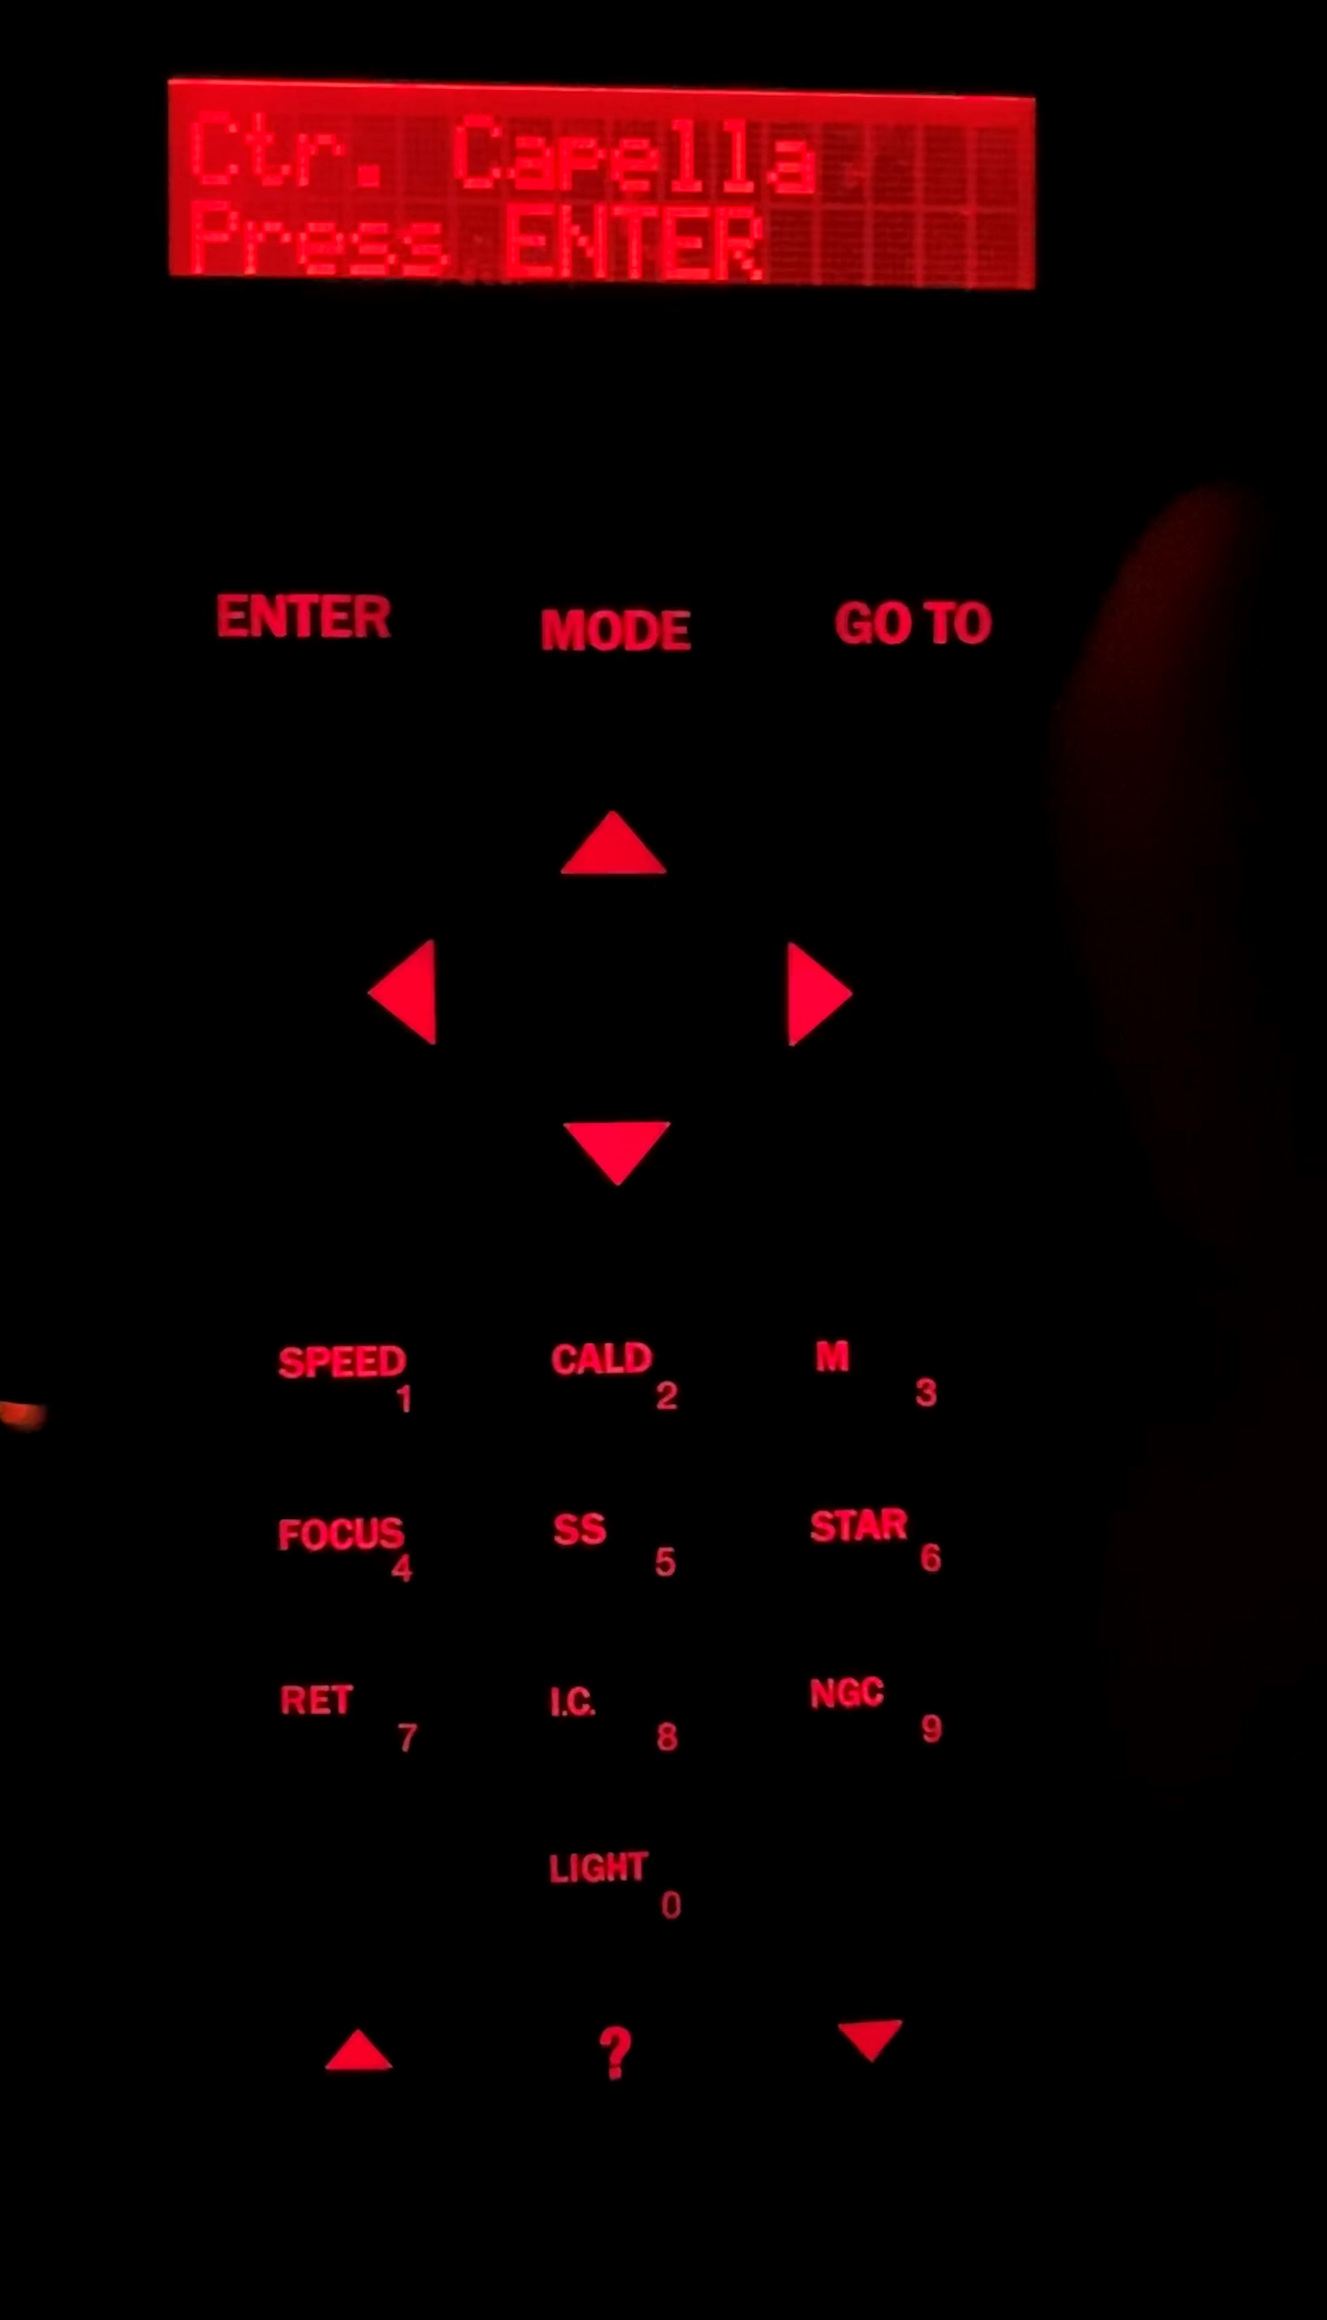
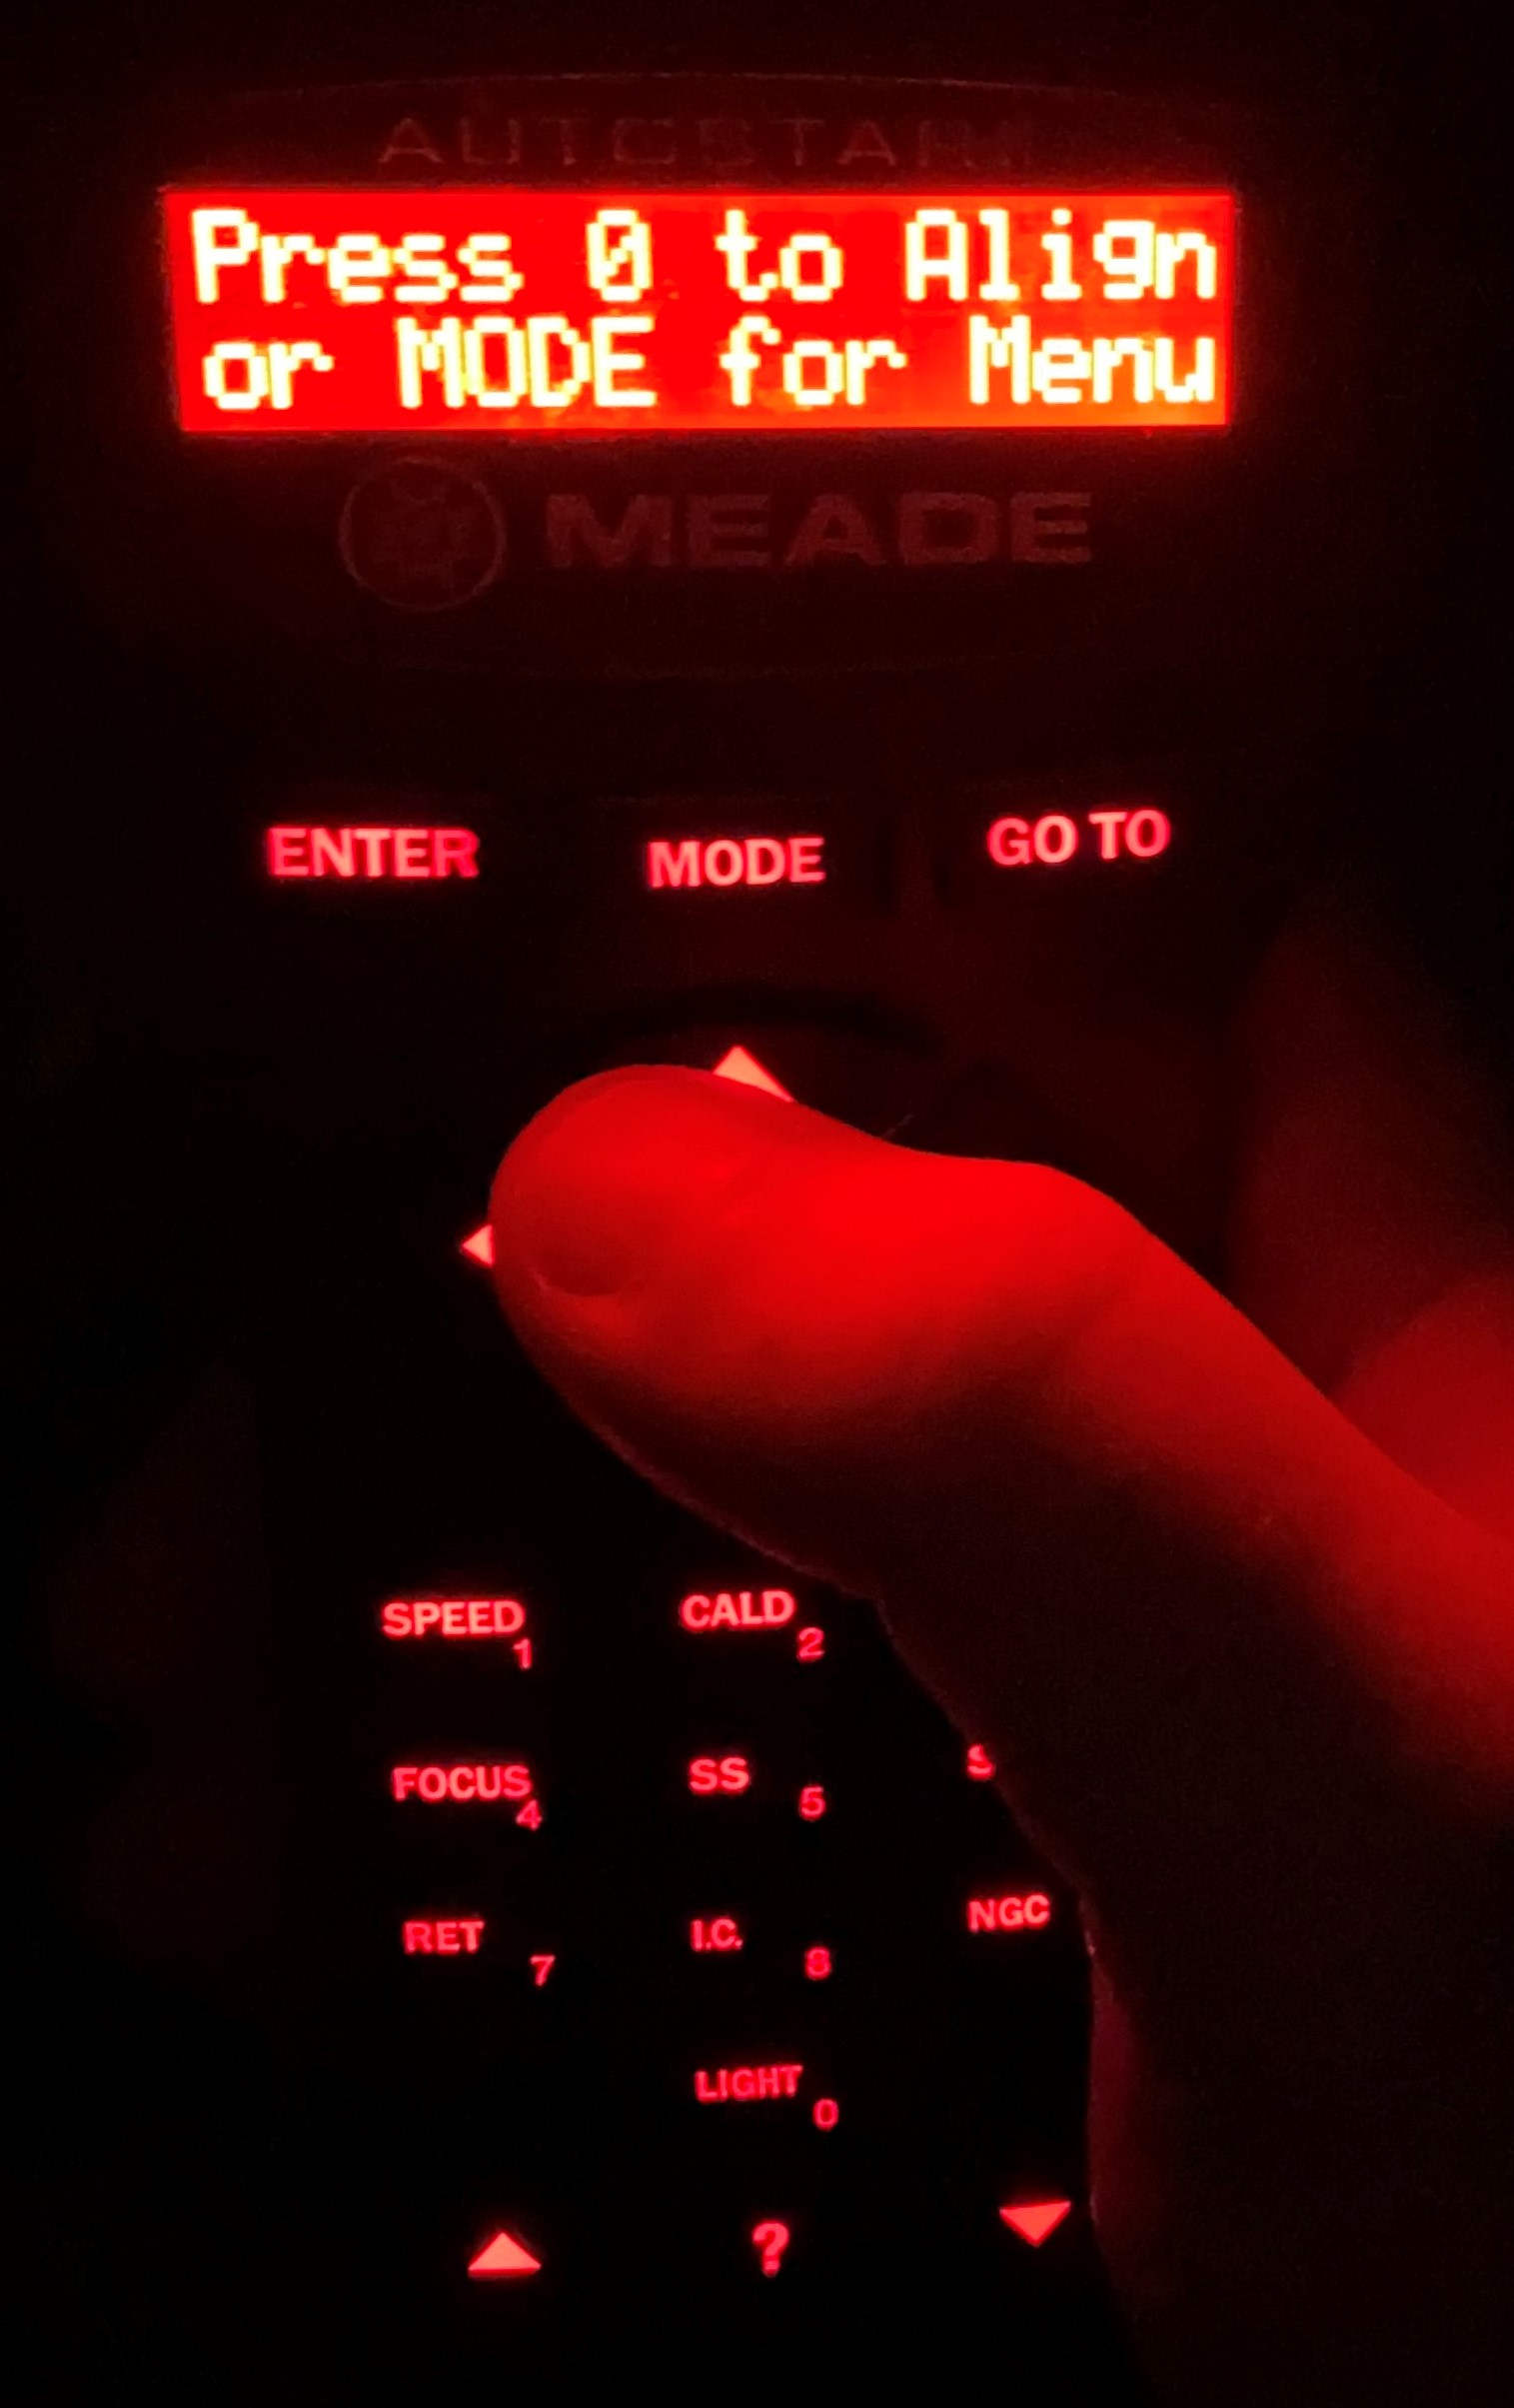
1.When you turn the telescope on it will prompt you to "Press 0 to Align or MODE for Menu." When you see this press Mode as we do not want to use the automatic alignment process. See fig below.
Figure 1: Initial prompt at startup.

- Once you hit the MODE button it will prompt you whether daylight savings is being used for time. For this you will select NO as usual.
- It will then ask for the time, enter the time as presented on the DIMM computer. Dont forget to enter the proper choice of AM or PM.
- Next it will prompt you for the date, use the current civil date.
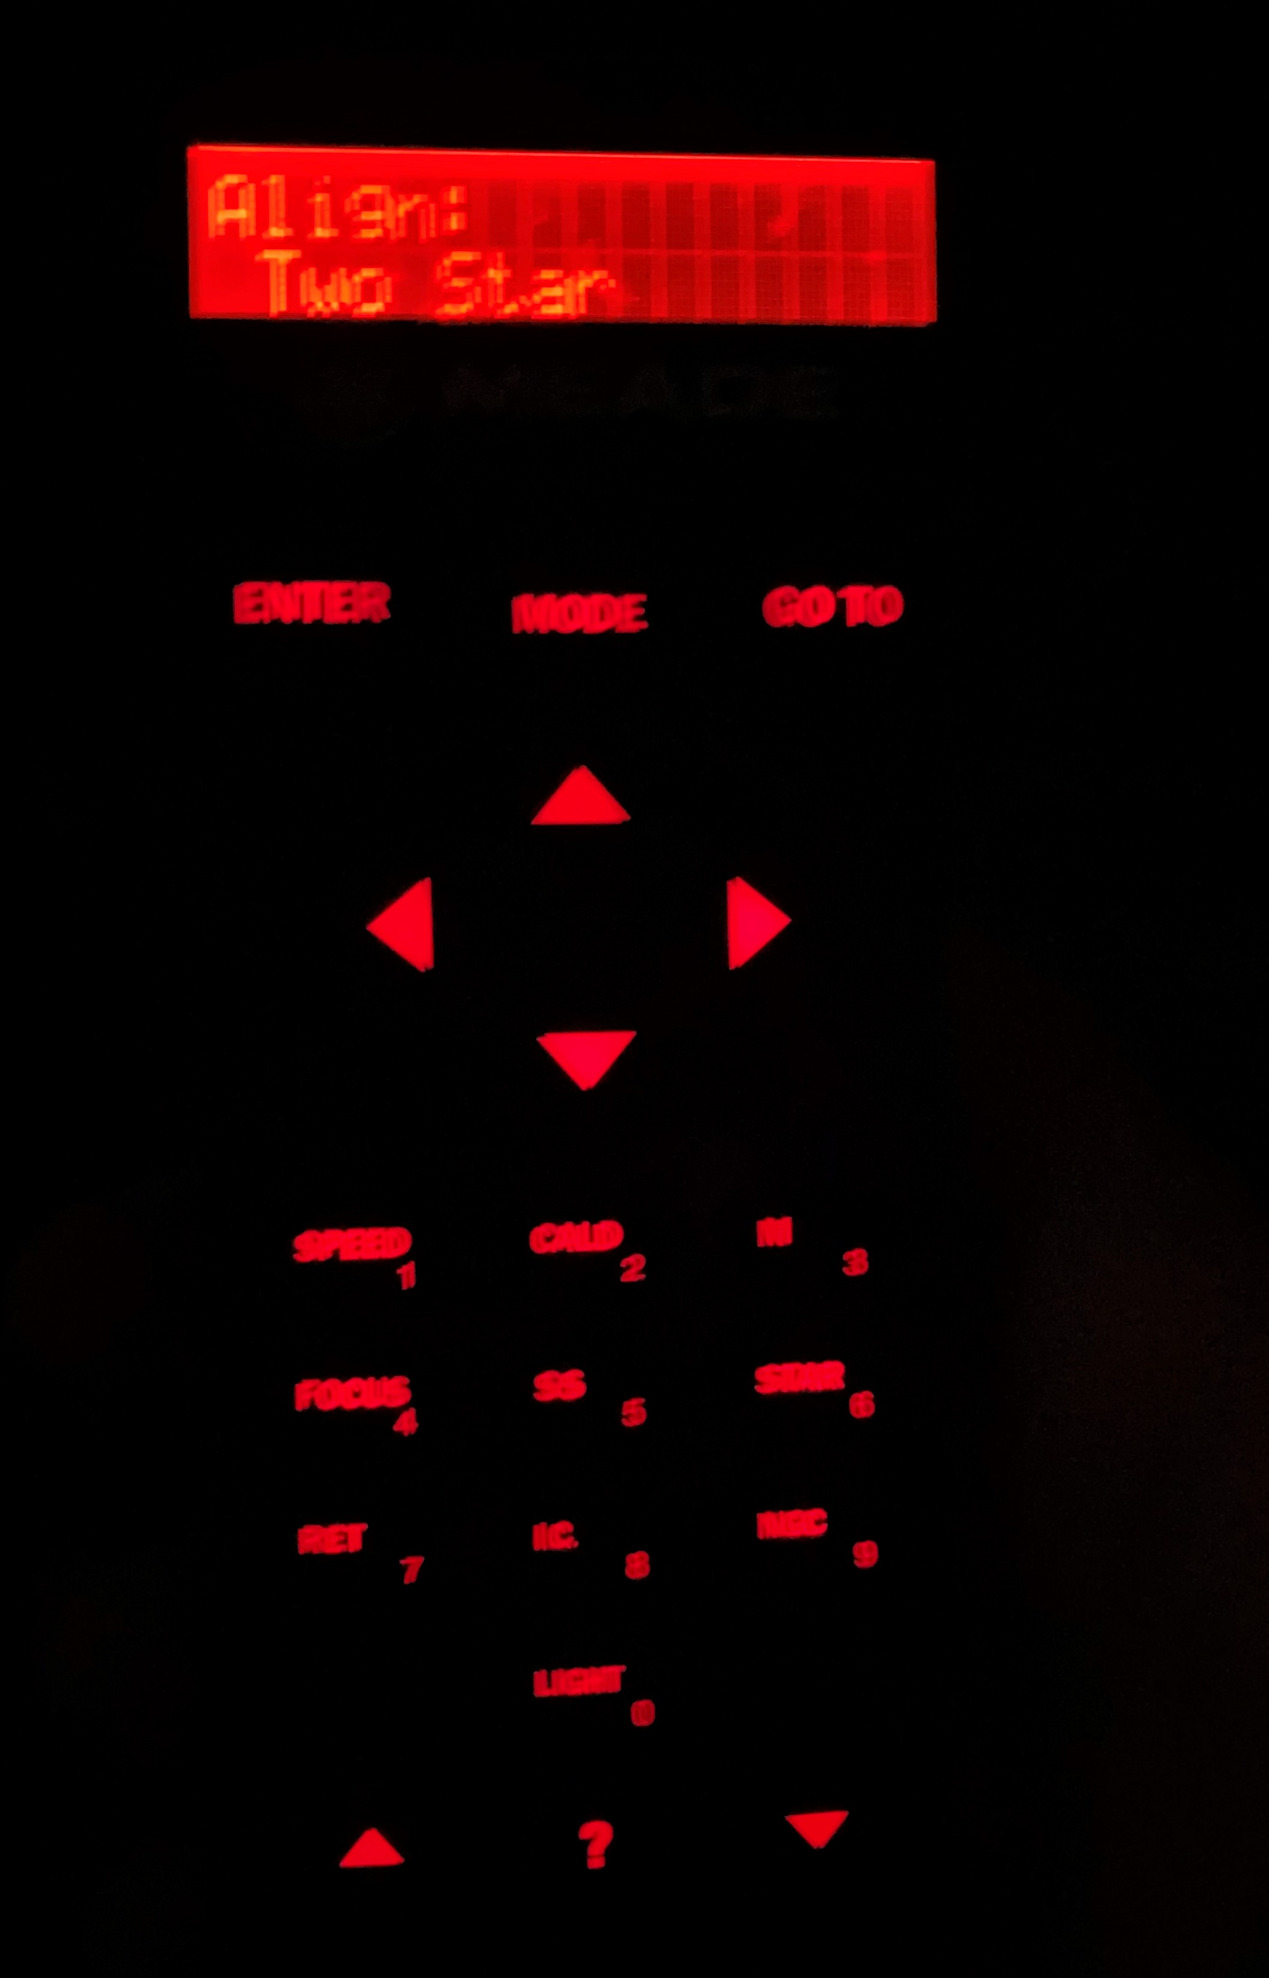
- It will then prompt you for the type of alignment you would like to complete. You will want to use the arrows at the bottom of the hand paddle to select "two star." The arrows are the very bottom buttons separated by a button with a "?" on it.
Figure 2: Prompt of choice of alignment.

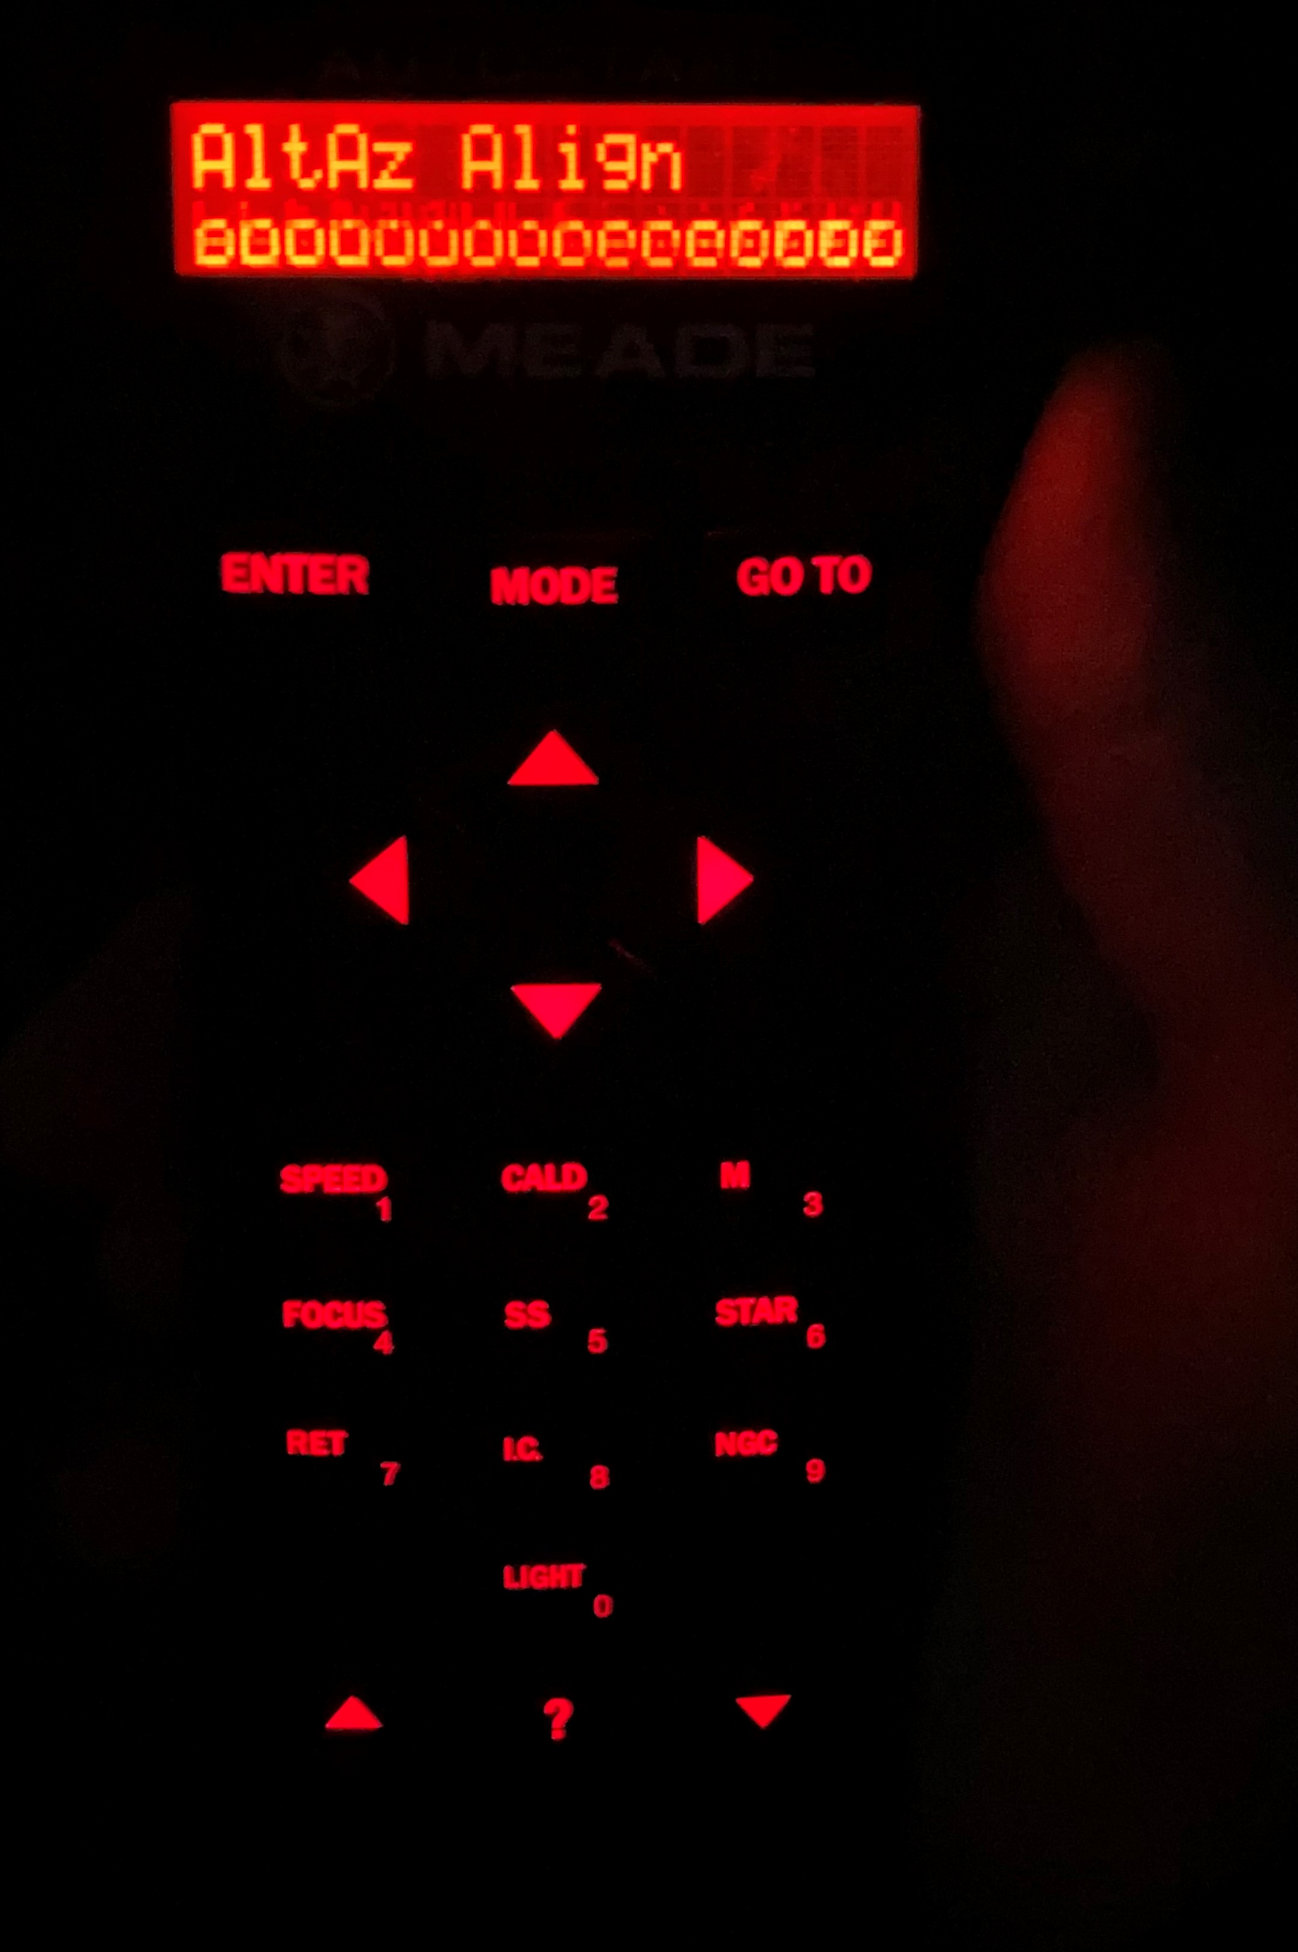
- It will then start the alignment process. Unfortunately the second line of the hand paddle display is garbled for this step. It should say to point the telescope north and to level the tube. See figures below.
Figure 3: Garbled directions telling you to point telescope north and level the tube, then hit enter.

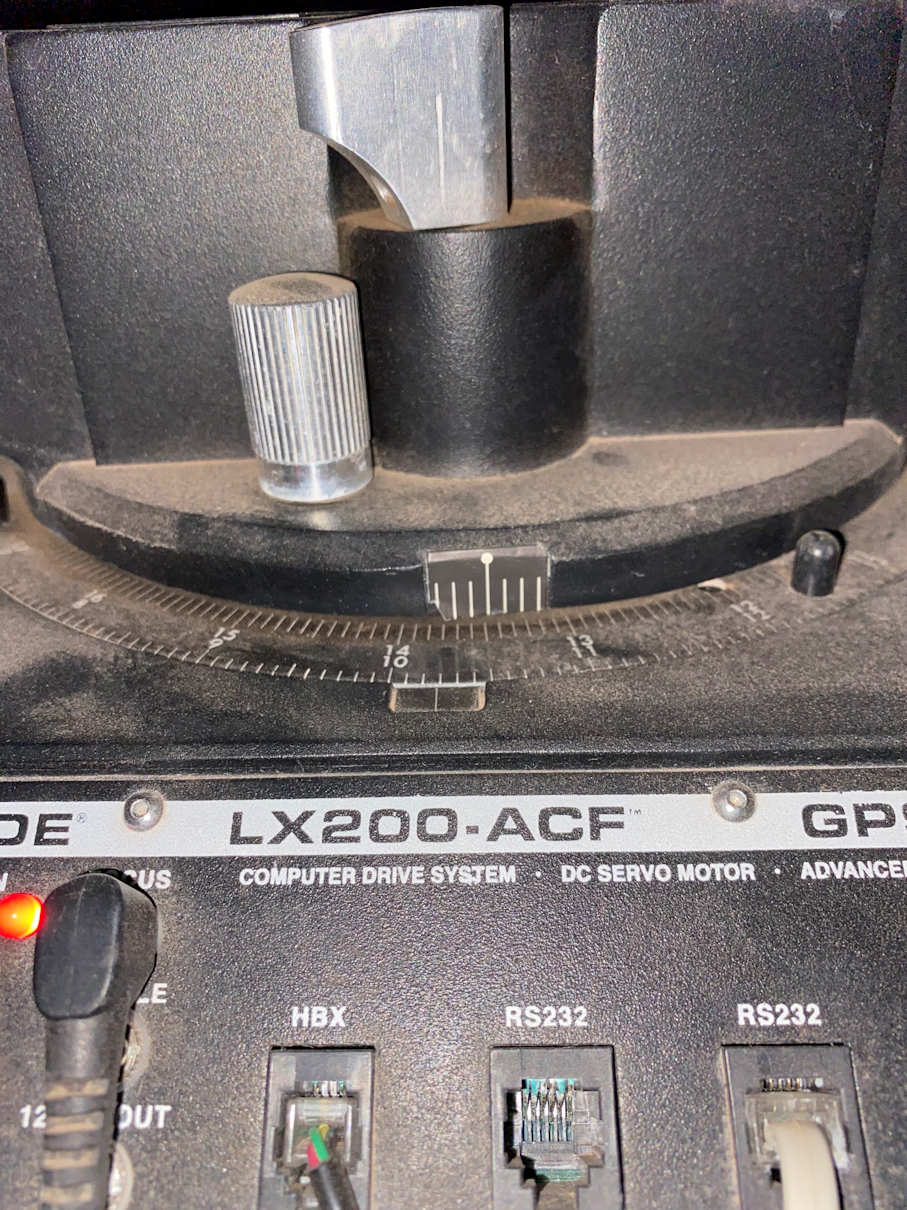
Figure 4: Position of Azimuth compared to back of telescope when pointed north.

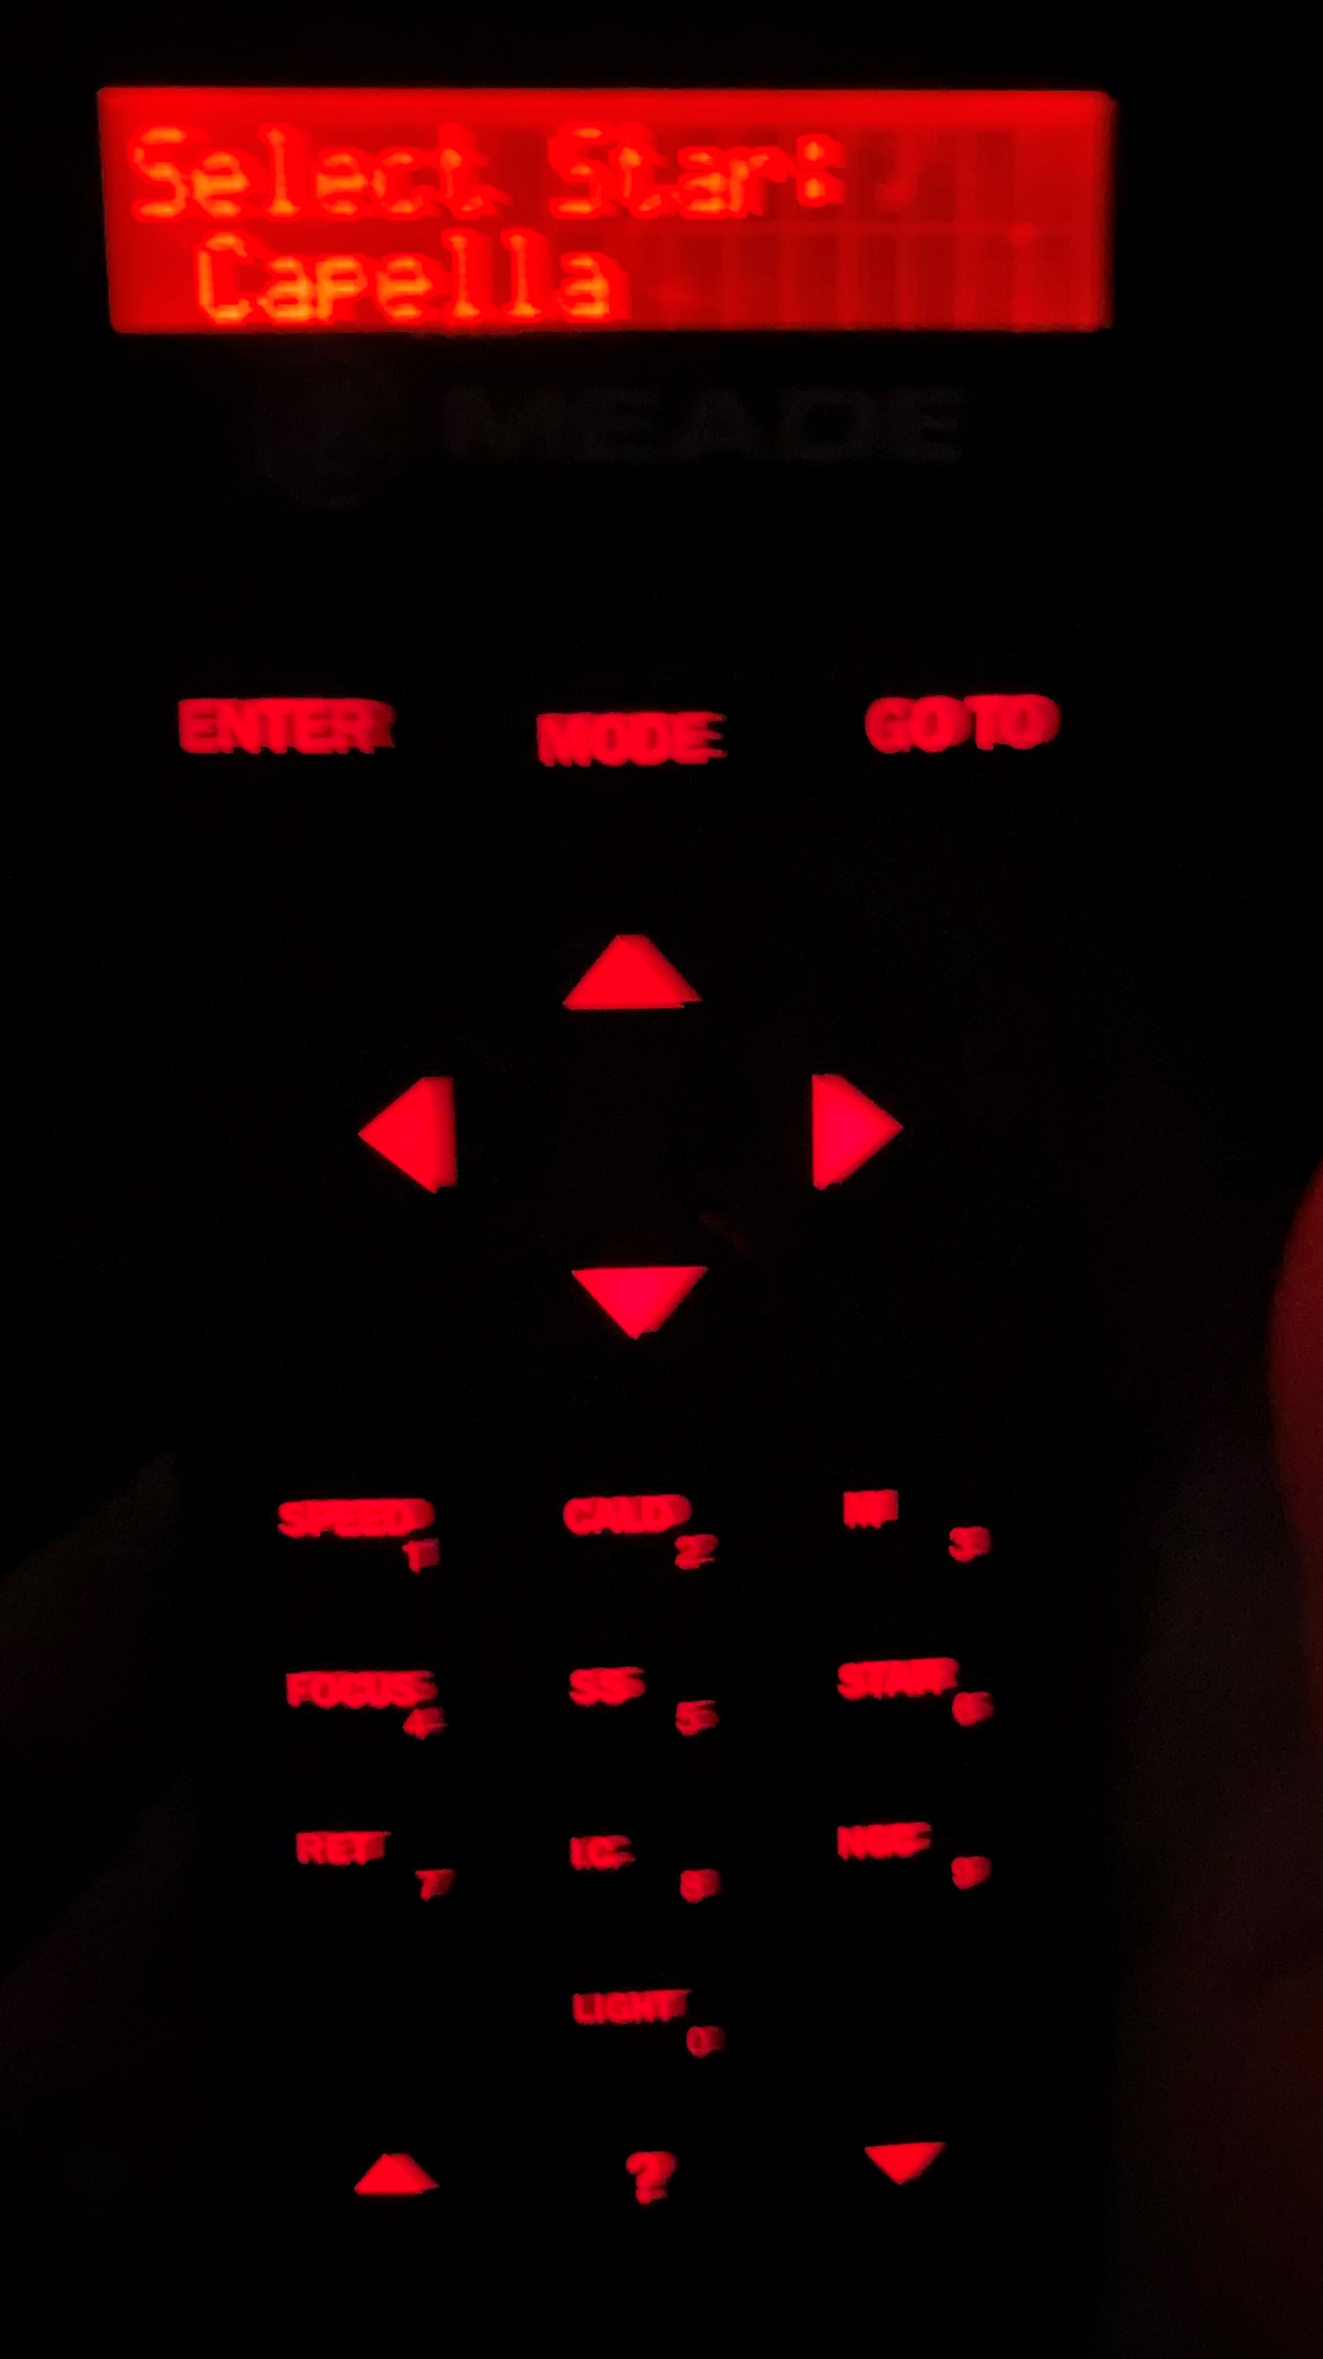
- Once the telescope is pointing north and level hit ENTER. It will then ask you to pick the first star you would like to use in the alignment. For this select a star that you know in the northern part of the sky. A star in a known constellation such as Dubhe in Ursa Major would be a good choice depending on the time of the year. You will use the arrows to scroll to the star. You will then hit Enter and the telescope should start slewing to the star if you have it pointed roughly north and level.
Figure 5: Menu asking to pick the first alignment star.

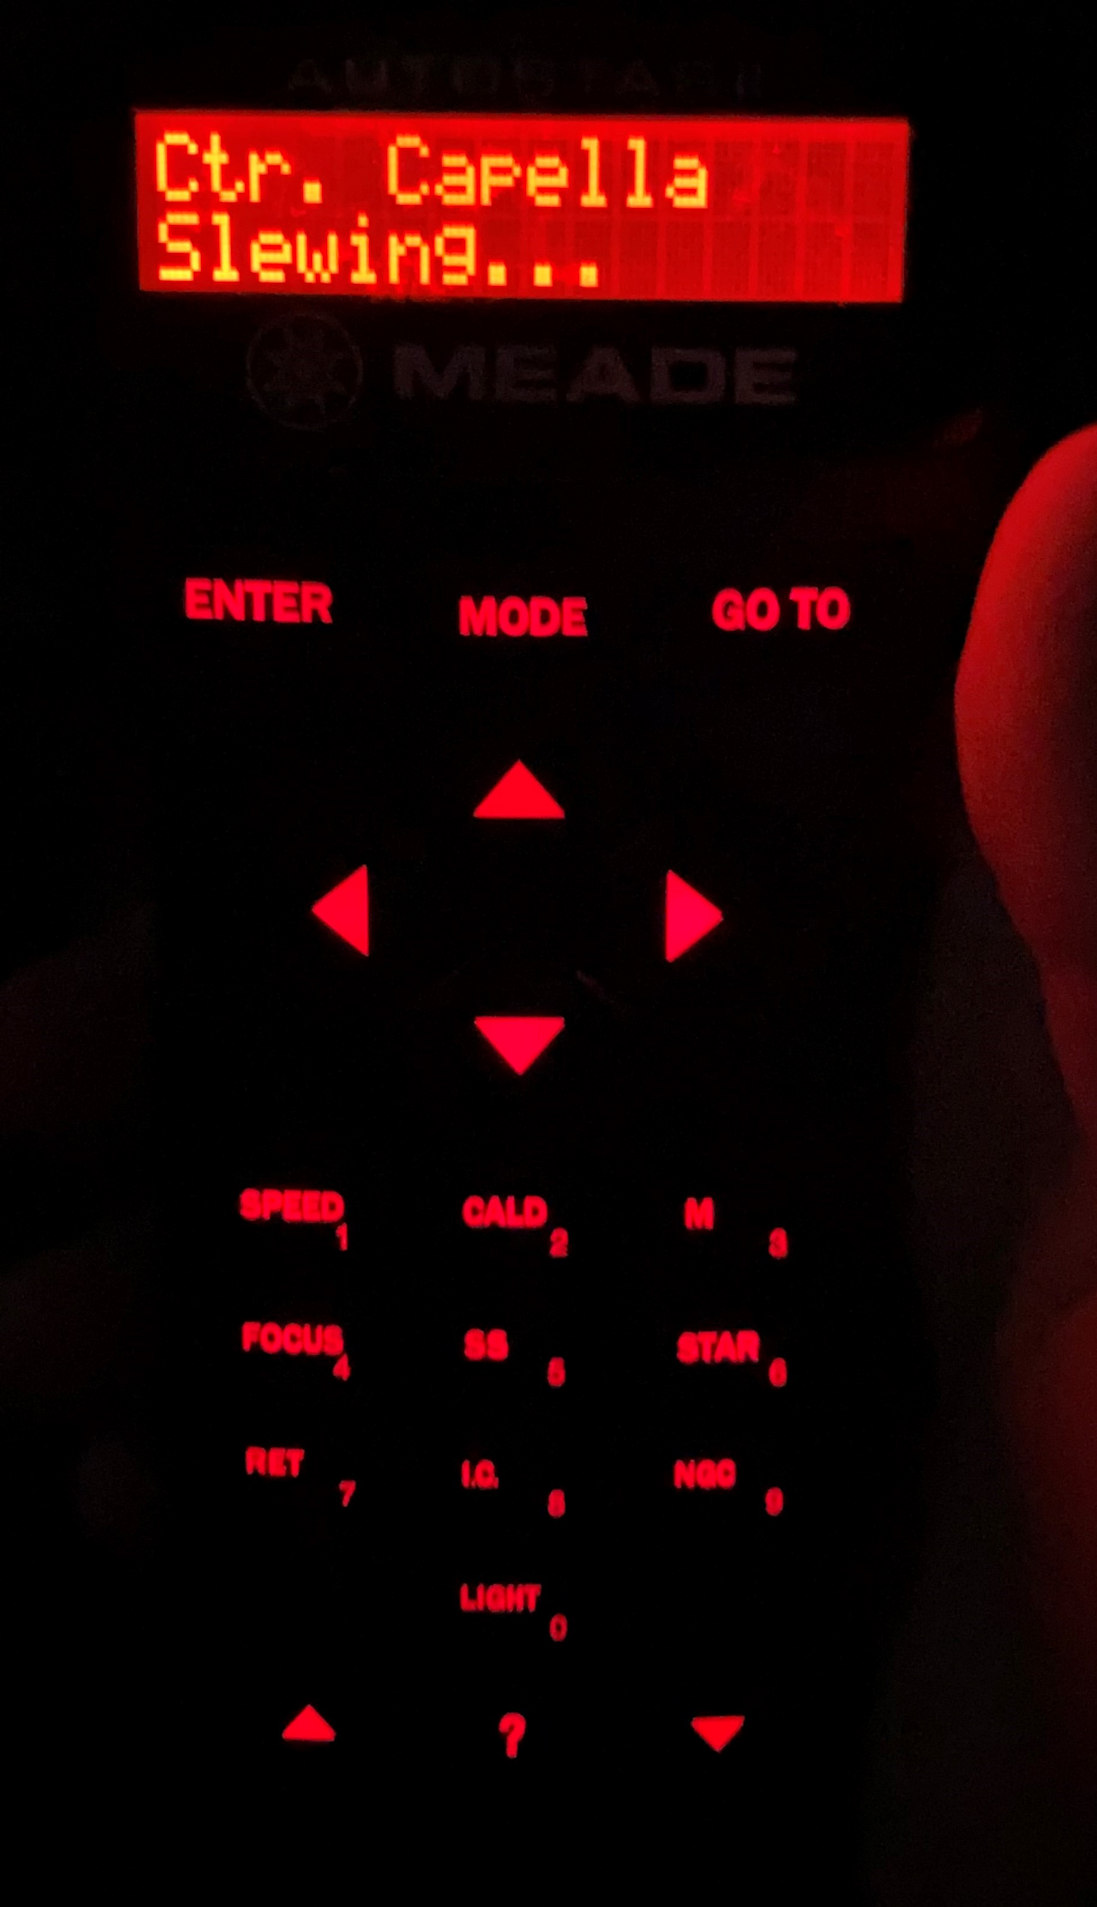
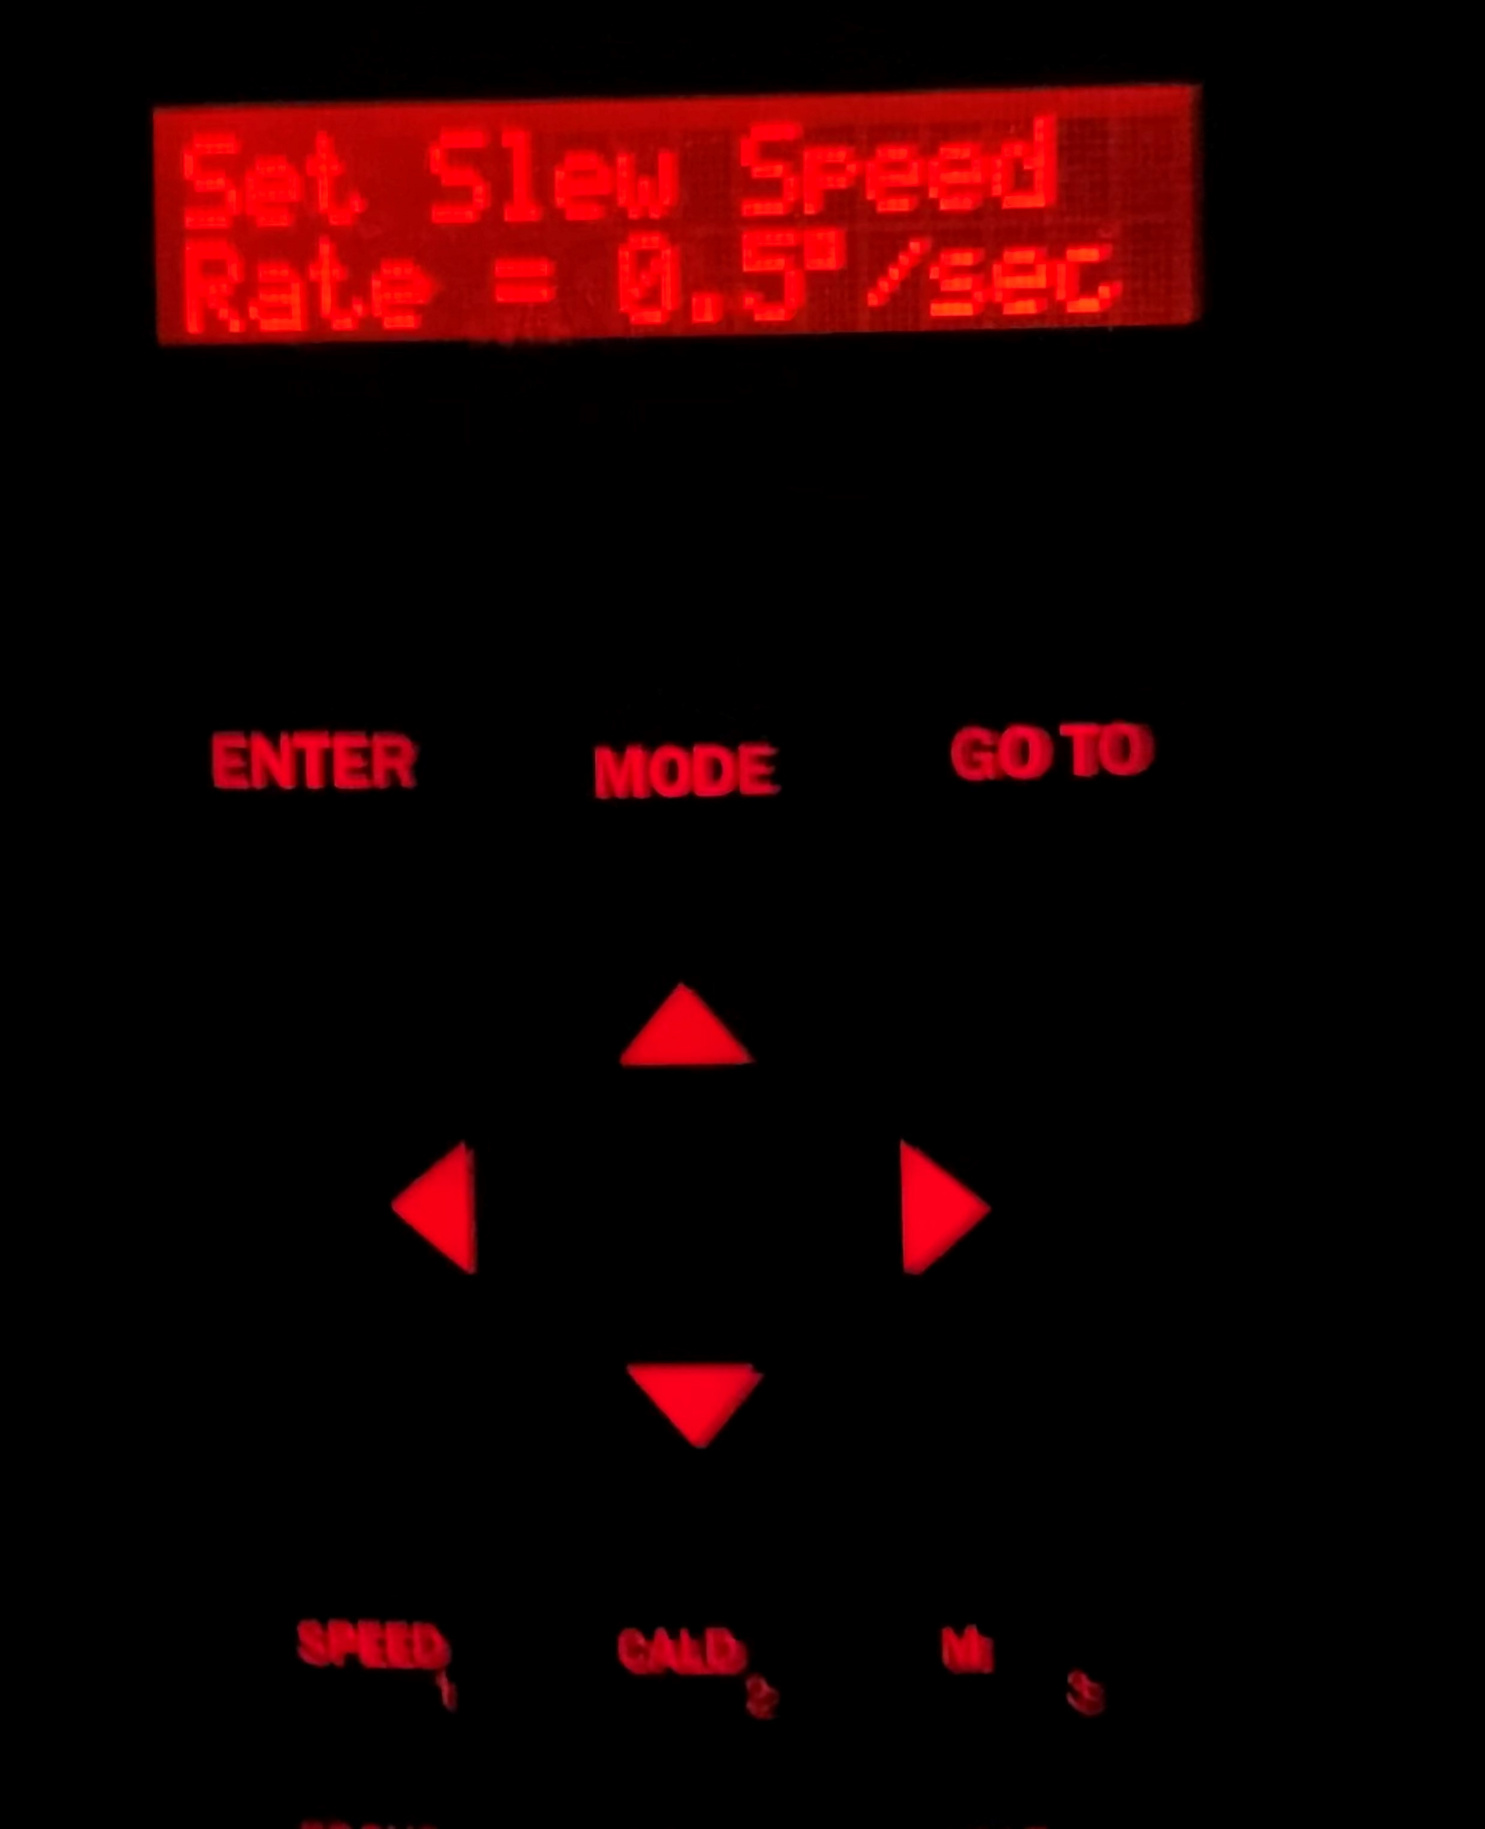
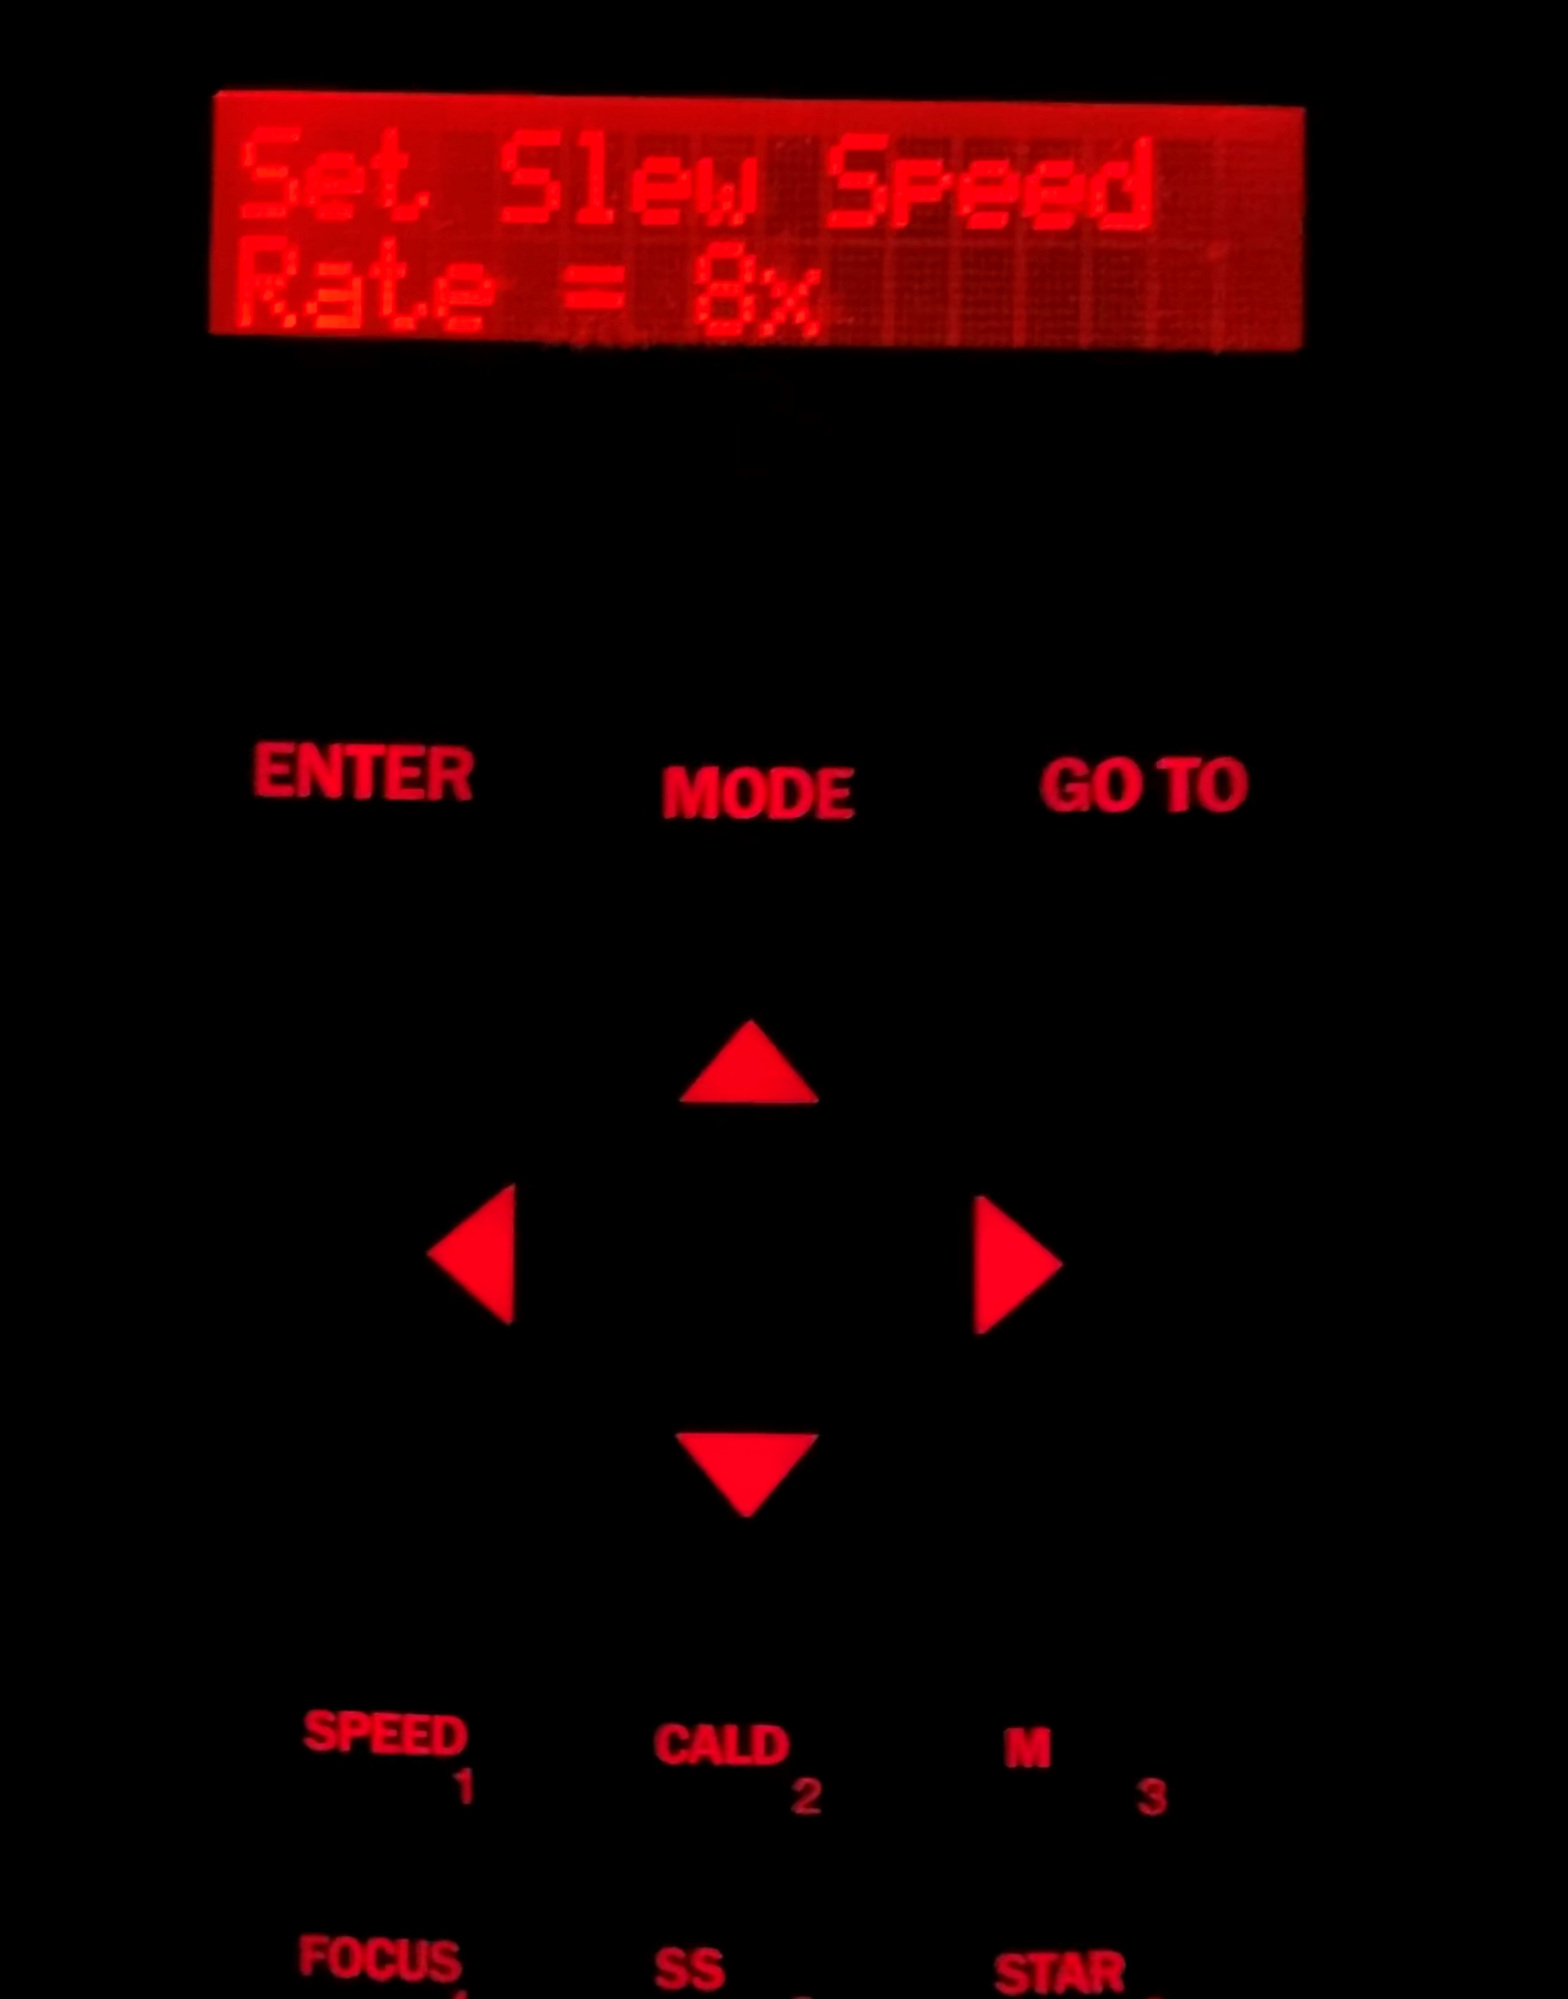
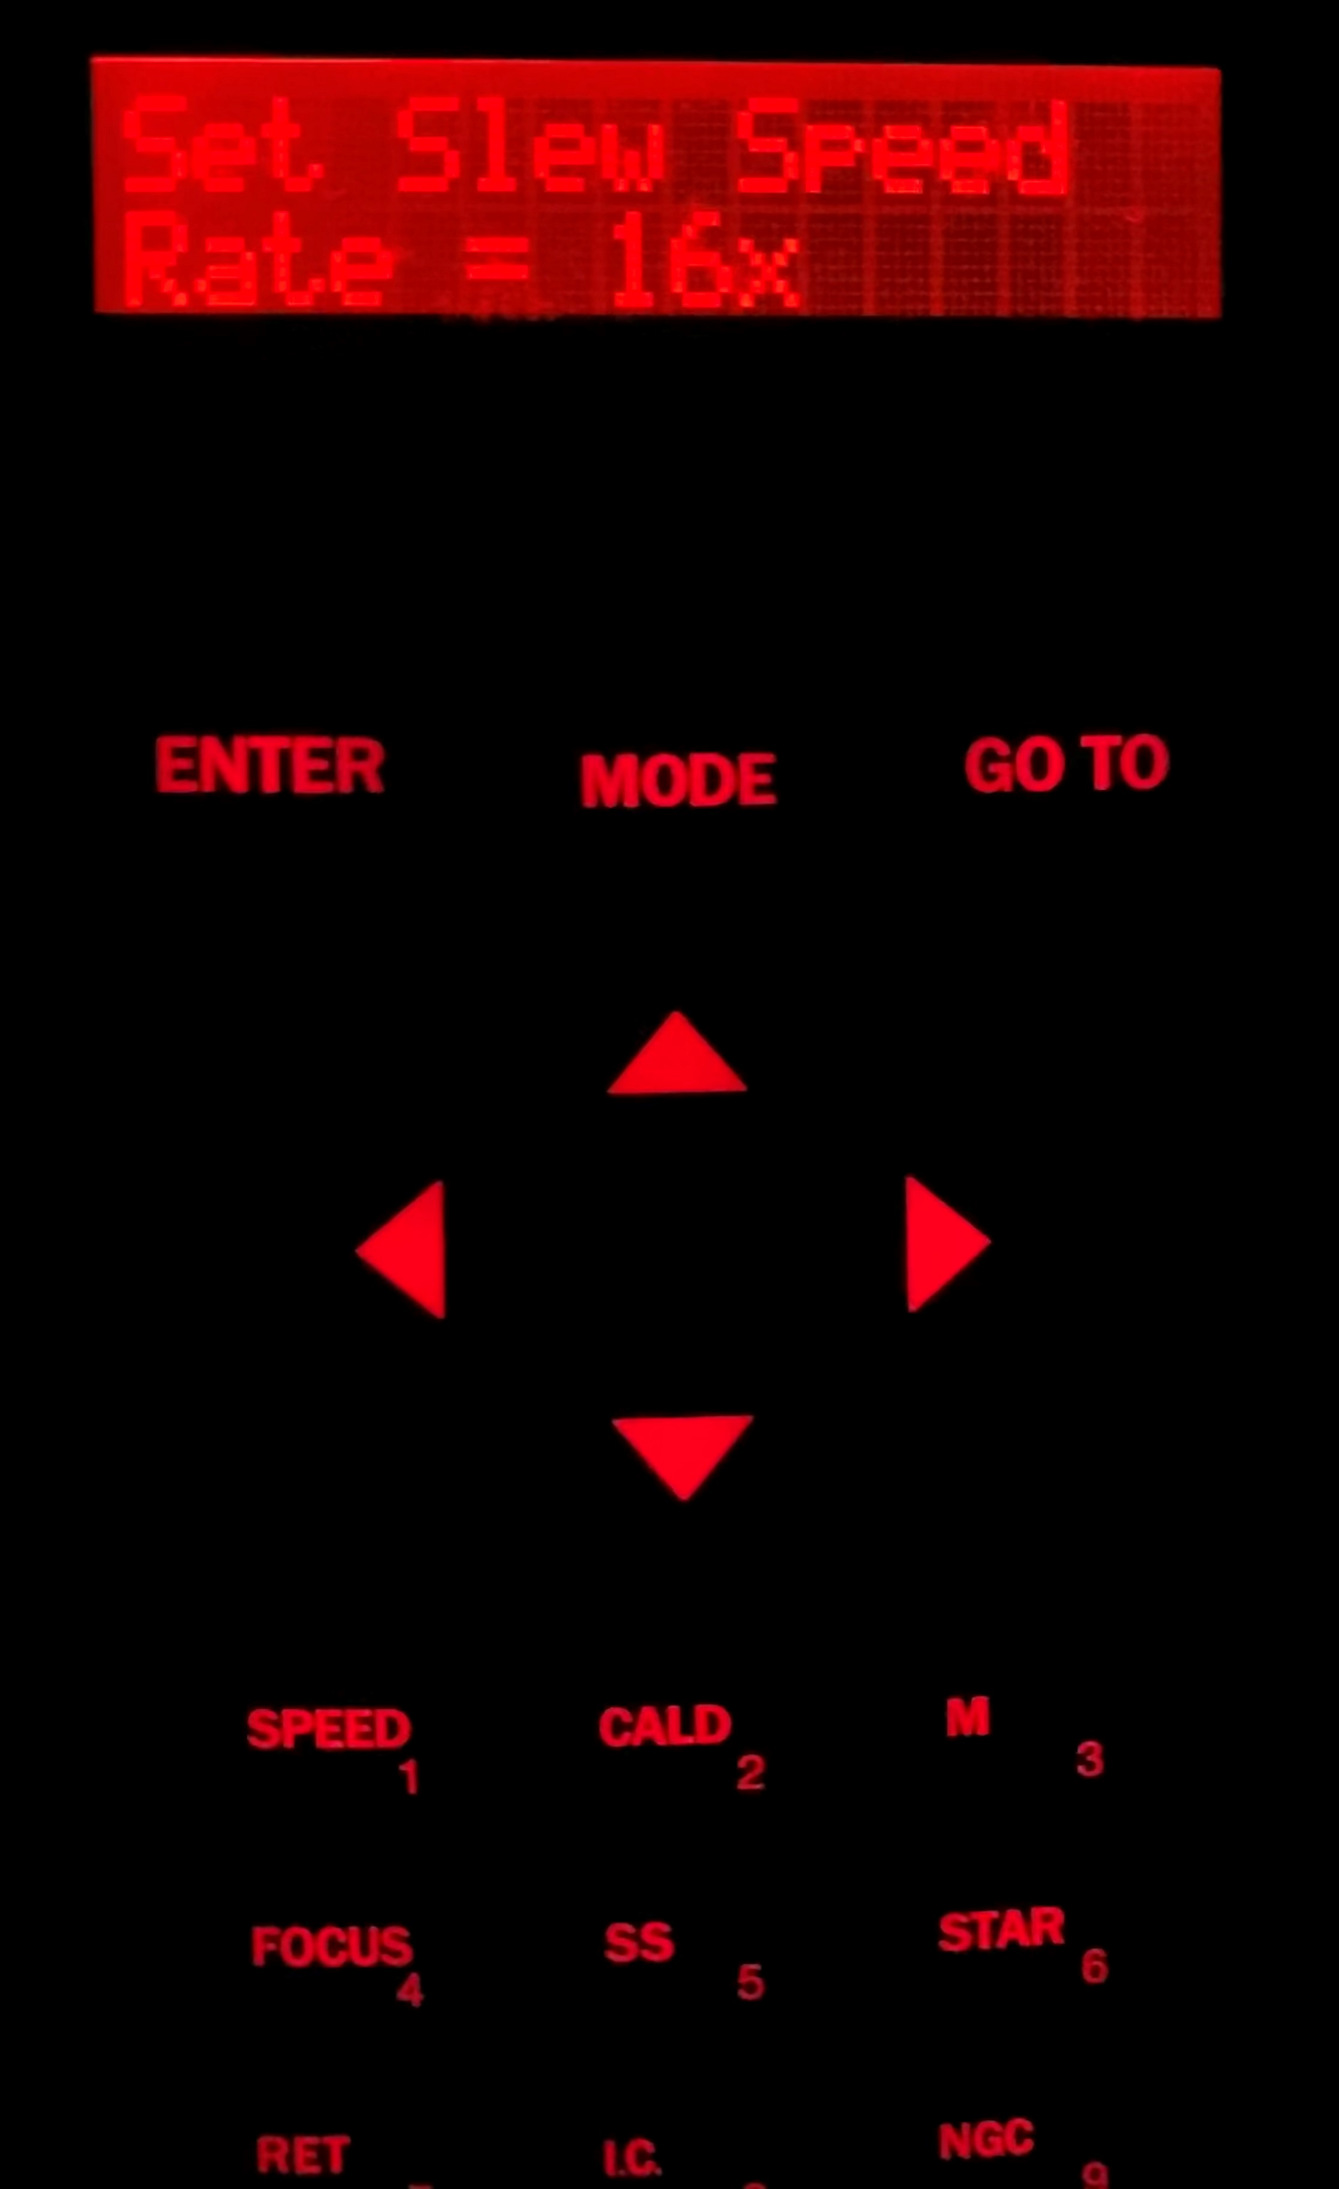
- You will then center the star in the eyepiece and hit enter. If you need to change the slew speed this can be done by hitting the button marked speed or 1. This button will bring up the speed menu. You can scroll using the bottom arrows to the desired speed. Speeds in degrees will be fast and ones such as 8x or 16x will be slower and best for doing the final centering in the eyepeice.
Figure 6: Menu will change after slewing telling you to center the star then push enter.

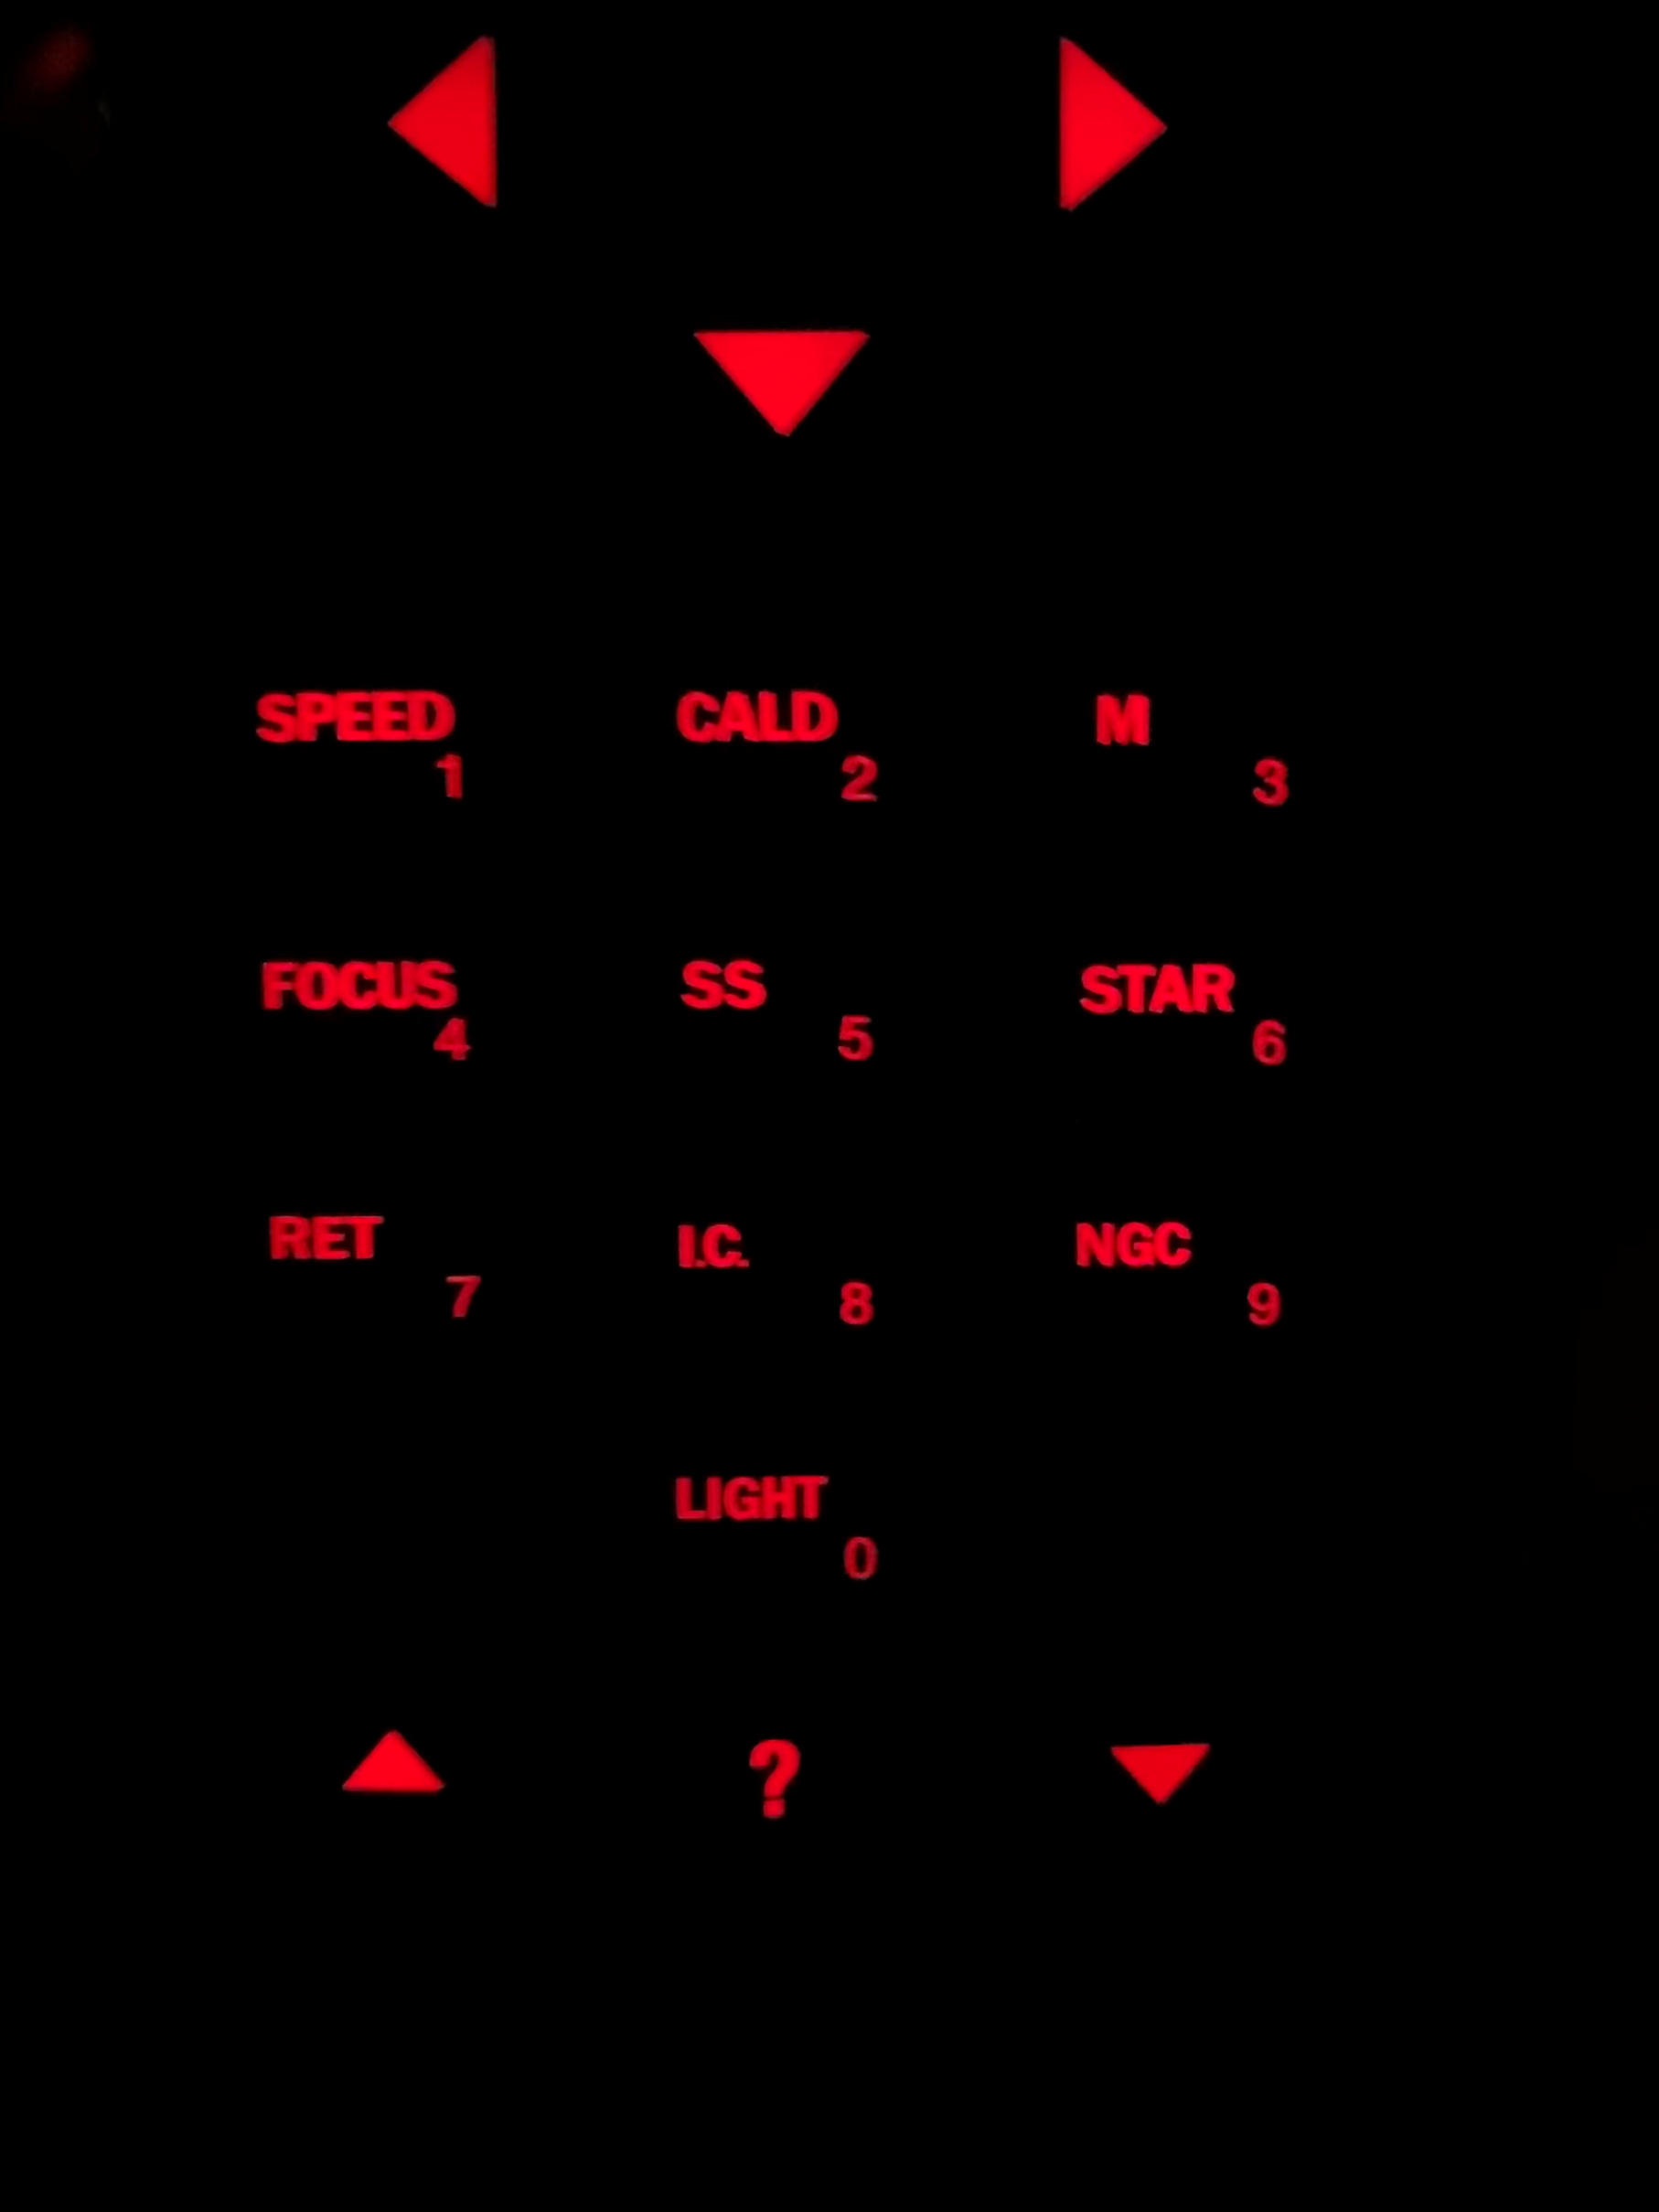
Figure 7: Buttons on the paddle. Notice how the buttons have multiple functions, the 1 button is also the speed button.

Figure 8: Adjusting slew speed to something fast.

Figure 9: Adjusting slew speed to something slow.

- Once you hit enter after centering the first star it will prompt you to pick another. I usually pick the star that I would like to leave the DIMM on such as Capella. It will slew to this star and you will center it up and hit enter. Once you have centered the second star successfully it will briefly beep and display "Align Successful" if everything has gone correctly.
- At this point DIMM operation has been returned to normal.
End of the Night
- Exit the DIMM software ("Exit DIMM" button) and select the option to warm up the CCD (can do on VNC)
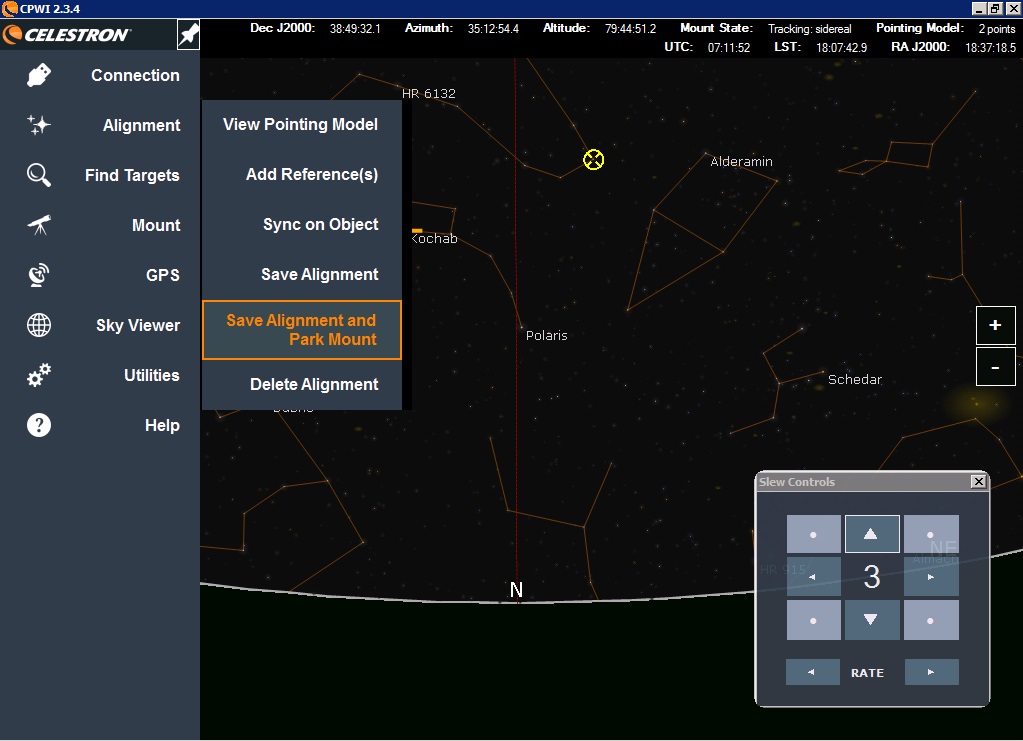
- Park the telescope:
- Either from the VNC:
- Open AutoStarCtrl on Desktop
- Check the "Connect" box under "Com Port" (wait)
- Under "Utilities" click "Park Scope"
- or using the telescope hand paddle:
- Hit the "MODE" button a few times to get out of named star mode
- Find the Utilities option and hit enter
- Select the "Park" option to move the telescope to level
- Allow to finish moving and report back "Power down telescope"
- Either from the VNC:
- Once the Park is complete turn off the telescope power at the base of the telescope
- Once the DIMM software has warmed the CCD and closed turn off the CCD power on the black box on the far side of the enclosure
- Close the roof shutter with a single press and release of the green button just inside the door
- Close the louvres by holding down the close louvre button just inside the door
- Double check that all louvres are closed; sometimes they stick open.
- Turn off the computer monitor with the fob next to the keyboard
- Lock the door and close firmly (knee optional)
Accessing DIMM finder camera video stream from RA desk
As of 13 Dec 2019, you can tune in to the DIMM video camera from the RA desk using the top monitor. Change its input source (using the touch-buttons on the bottom right edge) to "Composite", and you will see video from the camera mounted on the side of the DIMM telescope. Change the input to "DVI-D 2" and it will return to the normal MCS desktop screen.
Tips and troubleshooting:
The following is a table of the stars usually used during different months (under construction):
| Month | Stars |
|---|---|
| January | Capella, Arcturus |
| February | Capella, Arcturus, Vega |
| March | Capella, Arcturus, Vega |
| April | Capella, Arcturus, Vega |
| May | Arcturus, Vega |
| June | Arcturus, Vega |
| July | Vega, Deneb |
| August | Vega, Deneb |
| September | Vega, Capella |
| October | Vega, Capella |
| November | Vega, Capella |
| December | Vega, Capella, Arcturus |
If the DIMM enclosure roll-up roof will not open/close, try re-seating the blue-ended cable which plugs into the grey electrical box where those buttons are mounted.
- The metallic clip on the outside of the plug must be slid down directly about 3/8".
- The plug is rotated counterclockwise about 90 degrees.
- Pull the plug down directly to remove it.
If the DIMM box gets too big due to winds or very bad seeing you can reset this by going under Settings and hit Apply without making any changes If the DIMM software on the computer cannot connect to the telescope but everything looks normal otherwise, verify that the RS232 serial port cable has not come unplugged from the back of the computer (this happened in Dec 2022).
Changing the DIMM star with the AUTOSTAR software package
Close DIMM program (actions, exit)
Open Autostar GUI
click the comm. port connect (left-most) near bottom of GUI (Telescope must be powered on)
Will see :Initializing..." in the Options window
Choose Object from menu in left-hand window (AutoStarMenu)
Named stars ---> current star name displayed in right window
Select desired star using ScrollUp or ScrollDn
- Hit Enter when desired star is reached.
GoTo
Turn on video switch 9 to see wide field view
To center the star
- Set "Slew Rate" to Find
- Use Autostar hand paddle arrows to move N,S,E,W
Close Autostar (upper right cross)
Restart DIMM program
If you have to move star with "hand paddle" icon, use "Center" speed
Use DIMM handpaddle arrow (Center) to move star to center star (if needed)
- set to "Take Images"
- when centered, switch to "Start Seeing Measurements"
- when measurements begin, hit "Auto Center"
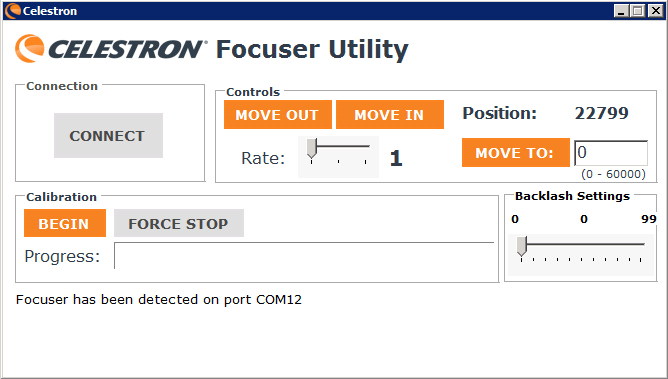
To adjust focus (if needed) use F- and F+ buttons near the hand paddle icon.
- best to change the Move Focus for" box to a value of 1000 millisec
Hit "Start Seeing Measurement" when star is focused and centered.
To park the DIMM
Exit DIMM program
Start AutoStar
Hit Comm. Port Connect
Utilities
Park Scope
Setting Up LX200 Classic
Before going outside, check that the RA radio and the control room radio are both on "H1" and can communicate with each other.
The following describes setup of the LX200 Classic Telescope:
- Unlock and open the door (using patented knee-assist method)
- Press and release roof open button
- Press and hold louvre open button until a breeze is felt
- Turn on power to the Telescope on the base panel of scope
- Turn on power to the CCD which is on the far side of the enclosure as a small black box
- Open the keyboard tray and turn on the computer monitor using the small fob next to the keyboard (might need to move mouse to wake it up)
- Select DIMM login and enter DIMM password (on post-it note under keyboard)
- Click the time and date on the computer in the lower right corner
- Using the telescope hand-paddle hit mode button until you see the time menu. Hold enter to adjust time.
- Using the hand paddle set the time to the computer time and then hit enter (time is in 24h format). Telescope will prompt for offset from GMT, be sure it is +06 then hit enter.
- Start the DIMM software on the computer by clicking on the DIMM icon on the Desktop. This will start the CCD cooling.
- Using the hand paddle, press "mode" until the display reads "Telescope" and "Object Library"
- Select "Telescope" and using the arrows at the bottom of the hand paddle scroll down to "Reverse E/W", push enter till there is a check mark after E/W indicating that this is enabled.
- Now scroll up to the 2nd item in this menu, "Align", push enter to select it and start the alignment process.
- Note always select stars that will stay north of the Zenith.
- It is best to do a 2 star alignment, to select this option you will hit the 2 on the hand paddle to select 2 star alignment.
- The telescope base is already level, so when it prompts you to level the base you can just hit enter.
- When prompted hit enter and select star 1 for the two star alignment. Slew the telescope manually to the star you have chosen.
- Turn on the reticle on the Telrad finder
- Select the number "1" on the hand paddle to set the speed to slew.
- Once close to the star of interest you will probably want to switch the speed to find or center using either the number "4" or number "7" on the paddle
- center star in the Telrad finder
- turn off the reticle
- change the flip mirror on the eye piece so that you can see the star images (there should be two).
- shine your flashlight into the hole where the reticle screws in on the eyepiece to illuminate the rectangular boxes
- use the hand paddle to center the star images into the center of the boxes
- Hit enter and repeat the process for the 2nd star in the alignment
- Once aligned pick the star you would like to use for measurements in the DIMM software by clicking select and either picking a star by name or entering the number of the star in the dialog box.
- Click ok once the star of interest is selected and then click goto
- Fine tune your setup so that the star is inside the central box of the eyepiece
- Set the flip mirror to the CCD position and turn off the reticle
- On the telescope hand paddle, set the speed to "guide" (bottom left button on hand paddle)
- Sync the telescope with the current requested star by clicking the sync button in the DIMM software
- On the DIMM software, click the "Start Seeing Measurements" button
- Note: do not change the binning or exposure times or any other parameters as these may impact the seeing values that are determined.
- Also select the radio button for speed to "Guide", and check the "auto-center" check box (if it gets cloudy the auto-center routine will probably mess things up so uncheck this box when cloudy)
- Once good seeing measurements are coming in, turn off the computer monitor using the small fob next to the keyboard, close the keyboard tray, and close the door behind you
End of the Night
- Click the "Exit DIMM" button in the DIMM software, select yes to warming up the CCD
- Walk out to DIMM tower
- Using the hand paddle at slew speed, park the telescope roughly north with the tube level
- Once the telescope is pointed north and level, switch the power off
- Power off the CCD box on the far side of the enclosure and check to make sure the Telrad is powered off
- Close the roof shutter with a single press and release of the green button just inside the door
- Close the louvres by holding down the close louvre button just inside the door
- Double check that all louvres are closed; sometimes they stick open.
- Lock the door and close firmly (knee optional)
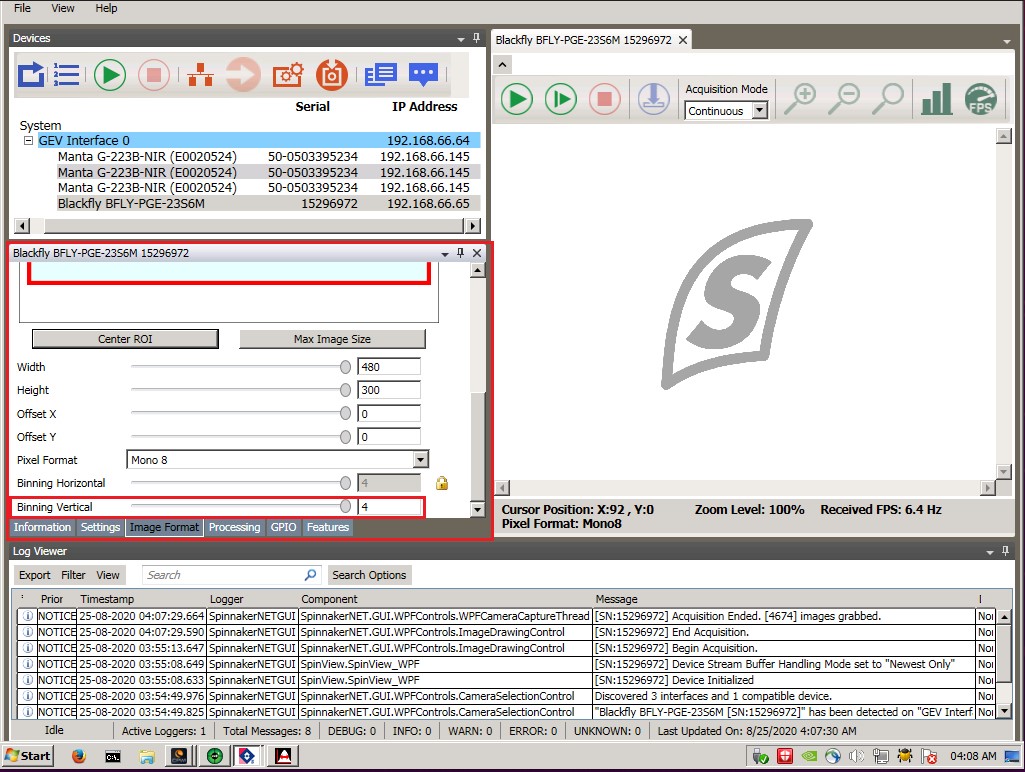
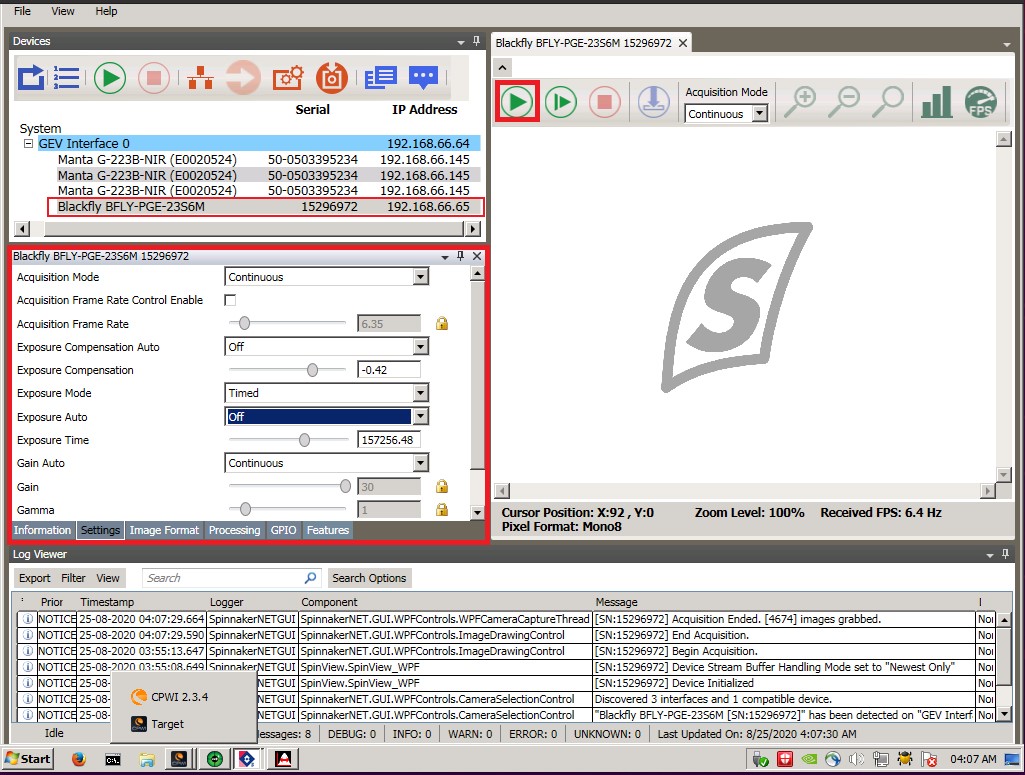
Accessing DIMM video stream from RA desk
The current camera setup for the DIMM is a FLIR blackfly camera. It is accessed by starting "Spinview" from the desktop. This feature has not been fully set up yet but should be usable soon.
Tips and troubleshooting:
Tips and troubleshooting are the same as above, refer to those if you encounter problems.
Attachments (46)
- moon_flir_crop.jpg (29.3 KB) - added by stevenj 4 years ago.
- moon_starshot_crop.jpg (24.9 KB) - added by stevenj 4 years ago.
- dimm_on_enclosure.jpg (170.0 KB) - added by stevenj 4 years ago.
- DIMM2CableDiagram2.jpg (136.9 KB) - added by stevenj 4 years ago.
- CPWIicon.png (23.0 KB) - added by justenp 4 years ago.
- Disconnect.jpg (162.7 KB) - added by justenp 4 years ago.
- Fig1ConnectingHandPaddle.jpg (202.6 KB) - added by justenp 4 years ago.
- PHD2_bullseye.jpg (229.3 KB) - added by justenp 4 years ago.
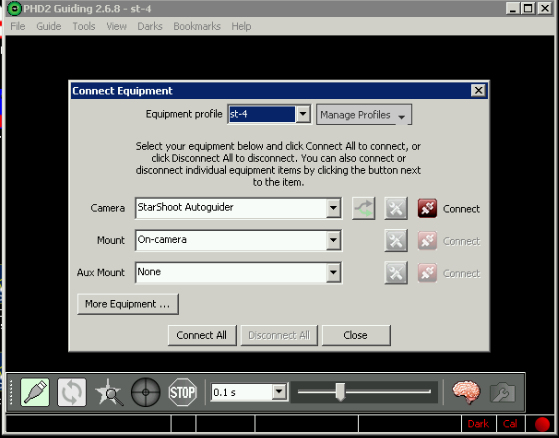
- PHD2_Connect.jpg (129.8 KB) - added by justenp 4 years ago.
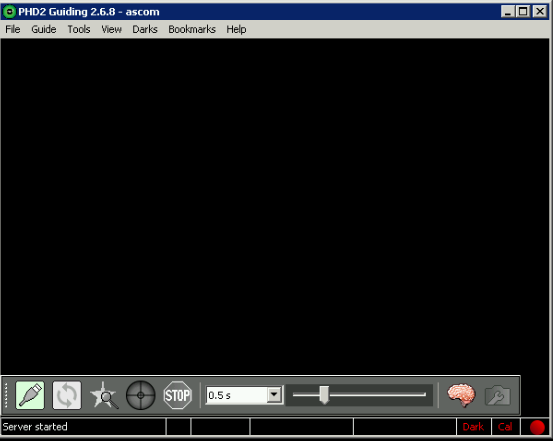
- PHD2Main.png (20.6 KB) - added by justenp 4 years ago.
- SaveAlignmentandPark.jpg (164.6 KB) - added by justenp 4 years ago.
- Screenshot from 2020-06-18 04-14-05.jpg (37.5 KB) - added by justenp 4 years ago.
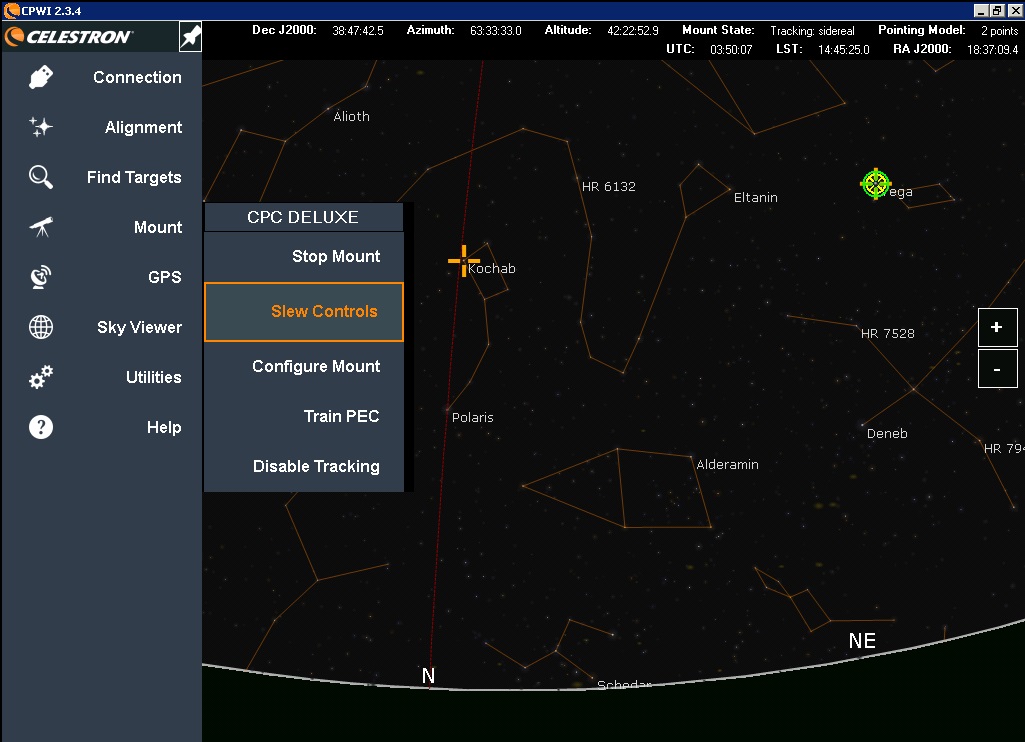
- SlewControls.jpg (170.6 KB) - added by justenp 4 years ago.
- SyncOnObject.jpg (173.7 KB) - added by justenp 4 years ago.
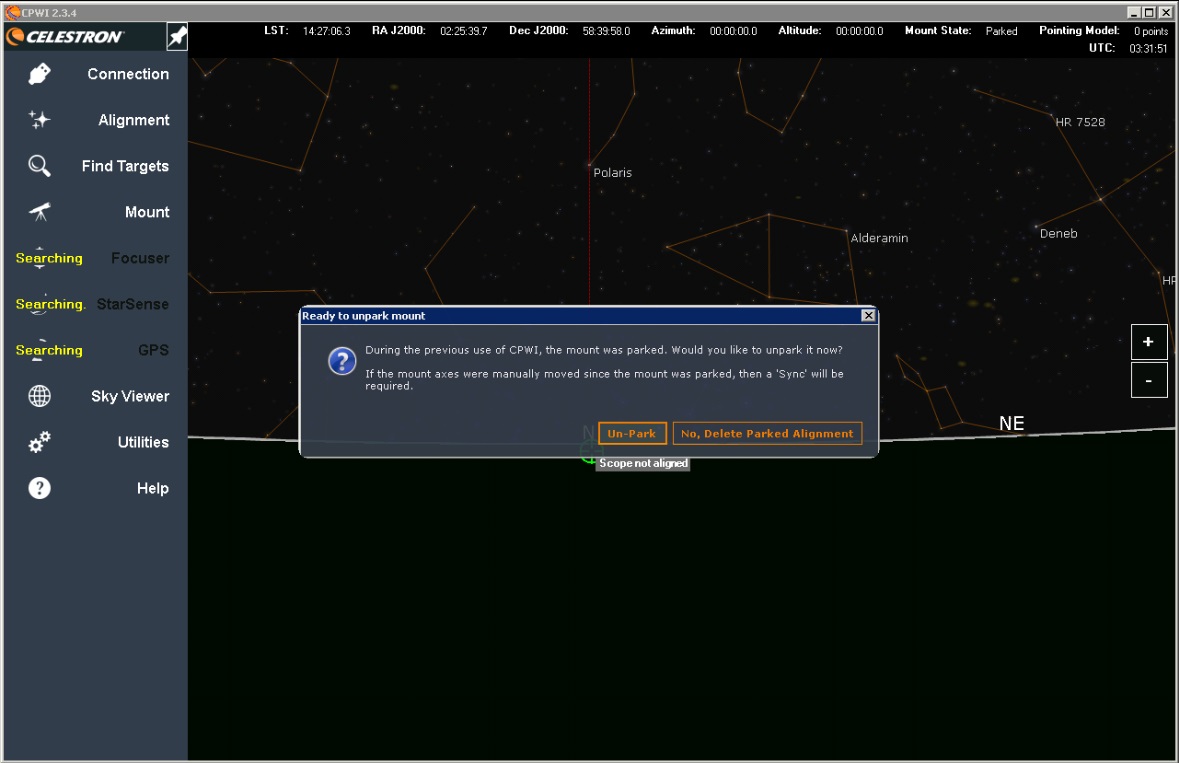
- unpark.jpg (121.2 KB) - added by justenp 4 years ago.
- dimm1_mizar.jpeg (102.6 KB) - added by stevenj 4 years ago.
- 2020_07_15.jpg (83.6 KB) - added by justenp 4 years ago.
- dimm_bothvega.jpg (238.8 KB) - added by stevenj 4 years ago.
- dimm_vega_other.jpg (232.7 KB) - added by stevenj 4 years ago.
- CCDPowerCompressed.jpg (199.4 KB) - added by justenp 4 years ago.
- ComputerPowerCompressed.jpg (203.9 KB) - added by justenp 4 years ago.
- LatchesCompressed.jpg (202.7 KB) - added by justenp 4 years ago.
- MasterPowerCompressed.jpg (205.0 KB) - added by justenp 4 years ago.
- OutsideEnclCompressed.jpg (203.0 KB) - added by justenp 4 years ago.
- RemoteSetup.jpg (203.1 KB) - added by justenp 4 years ago.
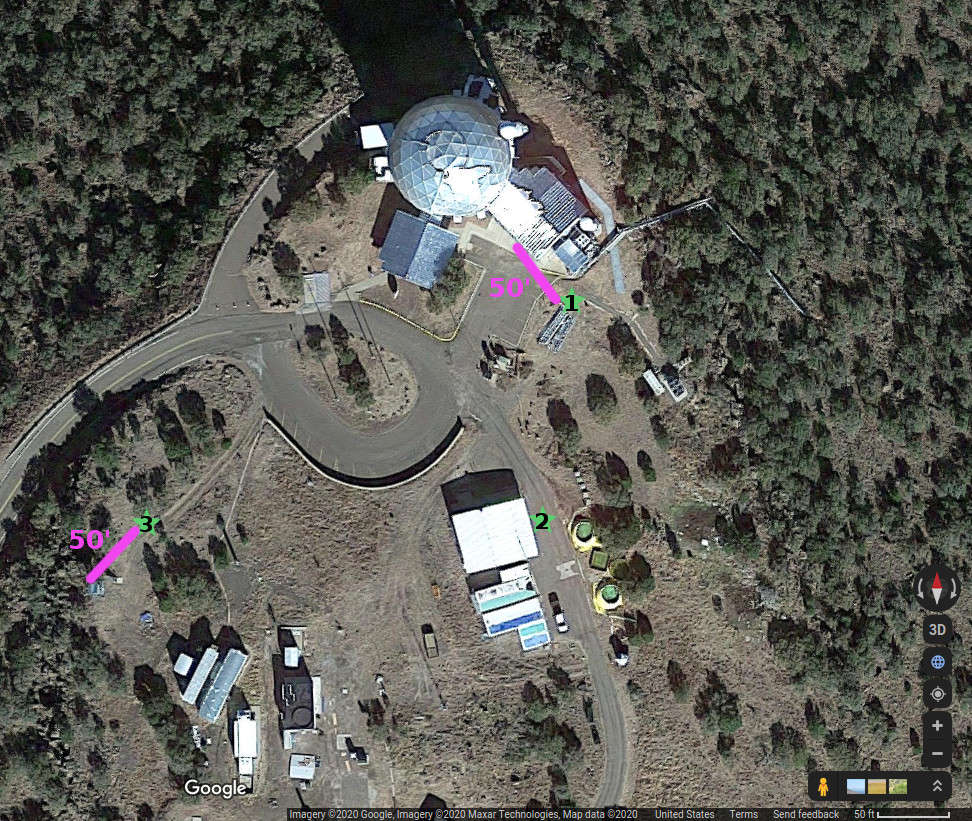
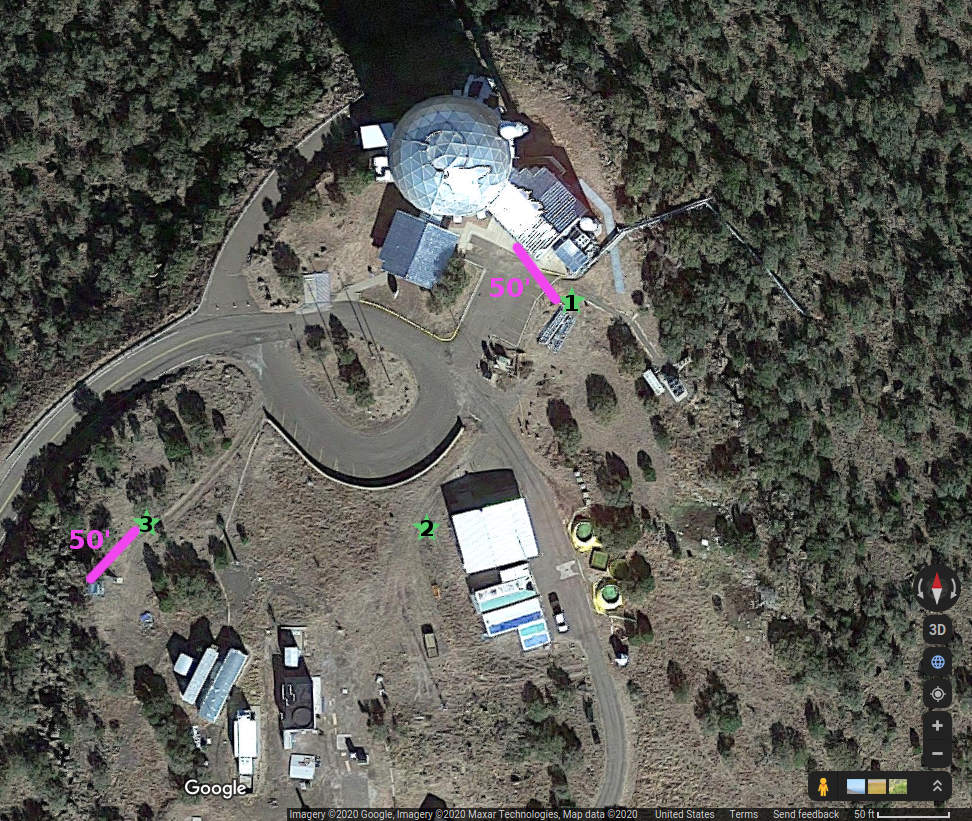
- DIMM2_map_2020_08_05_lo.jpg (190.2 KB) - added by stevenj 4 years ago.
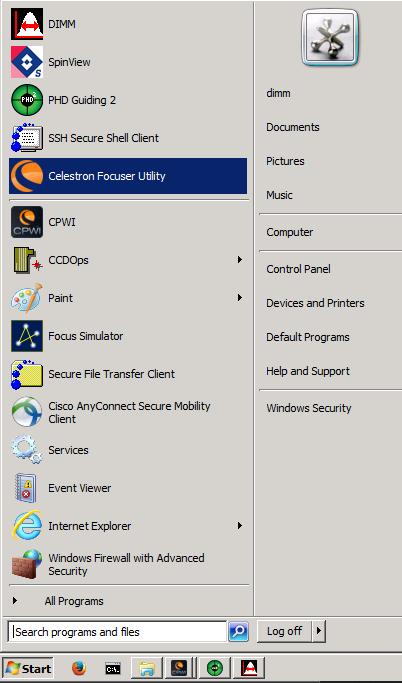
- OpenFocusUtility.jpg (198.2 KB) - added by justenp 4 years ago.
- FocuserSettings.jpg (153.3 KB) - added by justenp 4 years ago.
- SpinImageFormat.jpg (230.6 KB) - added by justenp 4 years ago.
- SpinSettings.jpg (229.5 KB) - added by justenp 4 years ago.
- dimm2_site1_same.jpg (239.6 KB) - added by stevenj 4 years ago.
- dimm2_site3_same_20200909.jpg (224.1 KB) - added by stevenj 4 years ago.
- DIMM2_map.jpg (205.1 KB) - added by stevenj 4 years ago.
- DIMM2_map_2020_10_14_lo.jpg (205.1 KB) - added by stevenj 4 years ago.
- dimm1.jpg (182.9 KB) - added by syed 4 years ago.
- CenterStar.jpg (205.5 KB) - added by justenp 3 years ago.
- HandCtrlOptions.jpg (202.5 KB) - added by justenp 3 years ago.
- LevelNorth.jpg (207.9 KB) - added by justenp 3 years ago.
- Pick2Star.jpg (202.1 KB) - added by justenp 3 years ago.
- PressMode.jpg (205.6 KB) - added by justenp 3 years ago.
- SelectStar.jpg (203.2 KB) - added by justenp 3 years ago.
- SlewingStar.jpg (197.0 KB) - added by justenp 3 years ago.
- SpeedFast.jpg (204.2 KB) - added by justenp 3 years ago.
- SpeedSlow1.jpg (208.0 KB) - added by justenp 3 years ago.
- SpeedSlow2.jpg (206.3 KB) - added by justenp 3 years ago.
- TelBase.jpg (203.8 KB) - added by justenp 3 years ago.